
Best Vinyl Graphics for Black Trucks: Top Picks for 2026

Table of Contents
- Why Black Trucks Are the Perfect Canvas for Vinyl Graphics
- Quick Comparison: Top Vinyl Graphics for Black Trucks
- Custom American Flag Decals for Trucks: A Standout Choice
- Matte vs. Gloss Vinyl: Which Finish Works Best on Black Paint?
- How to Apply Vinyl Truck Decals: Step-by-Step Guide
- Best Vinyl Material for Vehicle Wraps: Durability and UV Protection
- Maintenance and Longevity: Keeping Your Graphics Sharp
- Conclusion
- Frequently Asked Questions
Last Updated: September 20, 2026
Why Black Trucks Are the Perfect Canvas for Vinyl Graphics
Black paint is the most forgiving backdrop in the business. Dark surfaces hide the thin edges of a die-cut decal, mask minor bubbles, and make saturated colors pop with a contrast no white or silver truck can match. That is why so many owners searching for the best vinyl graphics for black trucks go bolder than they planned.
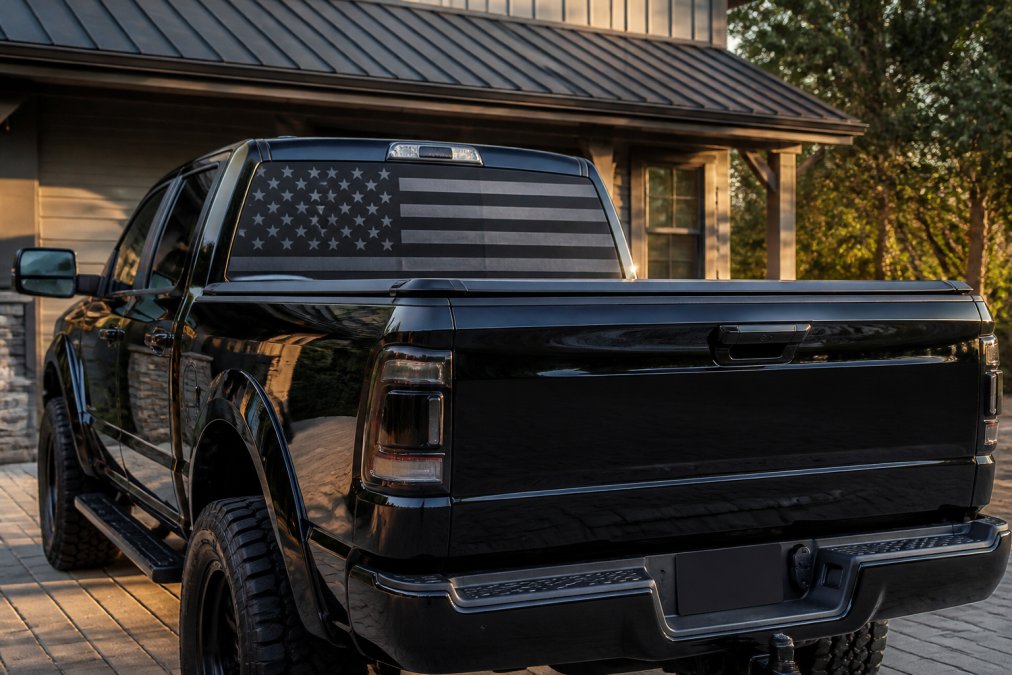
Quick Comparison: Top Vinyl Graphics for Black Trucks
Here is the short version for anyone who already knows what they want.
| Graphic Type | Where It Goes | Best For | Price |
|---|---|---|---|
| American Flag Rear Window Decal | Full rear window | Bold statement, privacy, heat reduction | $101.99 |
| Weathered American Flag Rear Window Decal | Full rear window | Distressed, vintage truck builds | $101.99 |
| Thin Blue Line Rear Window Decal | Full rear window | First responder tribute | $101.99 |
| V8 Engine Flames Rear Window Decal | Full rear window | Hot rod and muscle truck styling | $101.99 |
| Windshield Banner Decal (Denali, Duramax, SVT Raptor) | Windshield or body panels | Model-specific trim accents | $29.99 |
| The Last Supper Rear Window Decal | Full rear window | Religious artwork, full-color detail | $101.99 |
Perforated rear window graphics are the single highest-impact upgrade for a black truck. They cover the largest flat surface on the vehicle and add privacy without blocking your view out.

Custom American Flag Decals for Trucks: A Standout Choice
Custom American flag decals for trucks are our most requested design, and on a black truck they are almost unfair. The reds and blues sit against black paint instead of fighting a light background, so the flag reads as painted-on rather than stuck-on.

Matte vs. Gloss Vinyl: Which Finish Works Best on Black Paint?
Gloss vinyl is the safer default on black paint. A glossy laminate reflects light the way your clear coat does, so the graphic blends into the truck instead of sitting on top of it. Matte film absorbs light, creating a deliberate, flat contrast against glossy black.
How to Apply Vinyl Truck Decals: Step-by-Step Guide
Learning how to apply vinyl truck decals comes down to preparation and patience. The sticking takes minutes; the prep takes the rest.
What you'll need:
- Isopropyl alcohol and clean lint-free cloths
- A plastic squeegee with a felt edge
- A heat gun or hair dryer
- Masking tape
- A spray bottle with water and a drop of dish soap
- Wash the surface. Remove all dirt, wax, and bug residue. Any grit left behind becomes a permanent bump under the film.
- Wipe with isopropyl alcohol. This strips the oils that keep adhesive from bonding. Let it flash dry completely.
- Dry-fit the decal. Tape it in place and check alignment from ten feet away. Move it now, not after it touches paint.
- Peel the backing and wet the surface. A light soapy mist gives you a few seconds of repositioning time and helps trapped air escape.
- Squeegee from the center out. Use firm, overlapping strokes, working air toward the edges.
- Heat the edges. Warm the film with a heat gun on low and press the edges down hard to set the adhesive and prevent lifting.
- Inspect and re-press. Look for bubbles at eye level in direct light. Small ones usually disappear within a few days.
Best Vinyl Material for Vehicle Wraps: Durability and UV Protection
The best vinyl material for vehicle wraps is cast vinyl with a laminated top layer. Cast film is poured onto a casting sheet rather than calendered (rolled) under heat, so it has no built-in memory to snap back flat. That matters because every decal crosses a curve somewhere, a window edge, a rocker panel, a wheel arch, and calendered film pulls away while cast film stays put.
What to look for on the spec sheet
- Film type: Cast, not calendered. Calendered film is cheaper and fine for flat surfaces, but it shrinks over time.
- Thickness: Most premium cast films run around 2 mil. Thicker is not better here; thin film conforms to curves without lifting.
- Adhesive: Pressure-sensitive acrylic adhesive is the standard for outdoor vehicle use. It resists the heat cycling that breaks down cheaper rubber-based adhesives.
- Laminate: A cast laminate over the print is what actually blocks UV radiation. The ink sits under the laminate, not exposed to the sun.
- Ink system: Latex or solvent ink with an optimizer or clear coat that seals the print. Unsealed ink fades first.
We print only on top-rated 3M and Oracal films because they hold their dimensions through heat cycles. A decal that shrinks a sixteenth of an inch pulls its own edge up, and once an edge lifts, water gets under the film and failure accelerates.
Realistic service life
A laminated cast vinyl graphic on a truck that lives outside in a high-UV climate typically holds strong color for several years before noticeable fading, and the film often outlasts the print. Unlaminated film fades faster and, on perforated rear window vinyl, holds water in the holes during rain, clouding your rear view and shortening the print's life. That is why we recommend lamination on every rear window graphic we ship.
DIY vs. professional installation: the real cost trade-off
This is the decision most buyers get wrong.
DIY makes sense when:
American Flag Rear Window Decal Graphic →
- The graphic is a flat or gently curved surface, a rear window, a tailgate panel, a flat door section.
- You are applying a single decal, not a full wrap.
- You are willing to spend 45 to 60 minutes on prep and application and accept that a first attempt may show a bubble or two.
Hiring a pro makes sense when:
- The graphic wraps complex curves, deep recesses, or a full body panel.
- You are applying multiple pieces that must align perfectly (racing stripes, matched side graphics).
- The film is expensive enough that a ruined sheet costs more than the labor.
Shops charge by the hour or by the panel, and a single rear window decal is often the cheapest thing to do yourself because the surface is flat and the stakes are low. A full wrap is the opposite, material cost is high and a mistake wastes an entire sheet. Get any quote in writing, and factor in that a botched DIY install usually means buying the graphic twice.
Maintenance and Longevity: Keeping Your Graphics Sharp
A vinyl graphic needs less care than paint, but it needs the right kind. Keep the film clean, the edges sealed, and UV and chemicals off the print. Here is the routine that extends service life.
Washing
- Hand wash with mild soap and a soft mitt. Car-wash soap without wax additives is ideal. Rinse thoroughly so no soap film dries on the vinyl.
- Skip the automatic brush wash. Bristles catch edges and peel them back, and the high-pressure pre-soak can lift a corner.
- Never aim a pressure washer nozzle directly at an edge from close range. Keep the wand at a shallow angle and several inches back, and never use the narrowest tip on a decal.
- Wash cadence: Every two to four weeks normally; more often in winter if road salt is in play, since salt residue sits against the film.
Protecting the film
- Rinse bird droppings and tree sap off quickly. Both are acidic and etch vinyl if left to bake in the sun.
- Avoid waxing directly over matte film. Wax leaves white residue in the texture that is hard to remove. Use a matte-safe detailer instead.
- Park in shade or a garage when you can, especially in high-UV climates. UV is the biggest driver of fading.
- Do not use solvent-based cleaners, bug tar removers, or abrasive polishes on the graphic. They attack the laminate and adhesive.
Edge checks and minor repairs
Check the edges of every graphic twice a year, spring and fall are good reminders. Press down any corner that has started to lift. If dirt has collected underneath, clean it with isopropyl alcohol, let it dry, warm the film with a heat gun on low, and press it back down with a squeegee. A lifted edge caught early is a two-minute fix; ignored, it becomes a peeling sheet that takes the print with it.
Removal when the time comes
Removing old vinyl graphics is easier than most people expect if the film was quality to begin with. Warm the graphic with a heat gun or park the truck in the sun so the adhesive softens, then peel slowly at a low angle, pulling straight up stretches the film and leaves adhesive behind. Work in sections on large graphics. Residue usually comes off with a citrus-based adhesive remover or isopropyl alcohol and a microfiber cloth.
Conclusion
Choosing among the best vinyl graphics for black trucks comes down to three decisions: the finish, the placement, and the material quality underneath. Get those right and a black truck becomes the best-looking canvas on the road.
Frequently Asked Questions
What are the best vinyl decals for trucks?
The best vinyl decals for trucks depend on your style and needs. For black trucks, matte finishes reduce glare and hide swirl marks, while gloss finishes add shine. Popular options include American flag rear window graphics, racing stripes, and tailgate inlays. Look for decals made from high-quality 3M or Oracal vinyl with UV protection and weather-resistant adhesive. Brands like Let's Print Big offer custom designs with laminated or non-laminated choices for extra durability.
Is glossy or matte vinyl better for black car decals?
Both have merits. Gloss vinyl reflects light and makes colors pop against black paint, but it can show swirl marks and water spots. Matte vinyl absorbs light, giving a stealthy, modern look and hiding imperfections well. For black trucks, matte is often preferred for a cohesive, understated appearance. Consider your climate: gloss lamination helps rain run off, while matte may require more frequent cleaning to prevent staining.
How long do high-quality vinyl truck graphics last?
High-quality vinyl graphics from reputable brands like 3M and Oracal can last 5 to 7 years outdoors when properly installed and maintained. Factors include sun exposure, climate, and care. Laminated vinyl adds UV protection and extends life. In hot, sunny states like Arizona, fading can occur faster, so lamination is recommended. Regular washing with mild soap and avoiding abrasive cleaners will help your graphics stay vibrant.
Can I apply vinyl decals to a truck myself?
Yes, with patience and proper tools. Clean the surface with isopropyl alcohol, use a squeegee to apply the decal, and a heat gun for curves. Many suppliers provide masked and weeded decals with instructions and video tutorials. For large full-coverage graphics like rear window decals, professional installation may be better to avoid bubbles and wrinkles. DIY saves money but requires a steady hand and a dust-free environment.
How do I remove old vinyl graphics without damaging truck paint?
Use a heat gun or hair dryer to soften the adhesive, then peel the vinyl slowly at a low angle. For stubborn residue, apply adhesive remover or isopropyl alcohol. Avoid scraping with metal tools. If the vinyl has been on for years, work in small sections and reheat as needed. After removal, clean the area and apply a wax or sealant to protect the paint. Always test on a small area first.