
High Resolution Wall Murals for Bedrooms: 2026 Guide

Table of Contents
- Why High Resolution Wall Murals for Bedrooms Change the Whole Room
- Design Styles That Work: Nature-Inspired, Floral, and Abstract Murals
- Peel and Stick Bedroom Murals vs. Traditional Wall Covering
- Best Practices for Mural Wall Preparation
- How to Install Wall Murals: A Step-by-Step Walkthrough
- Custom Sizing, Materials, and What Drives the Cost
- Lighting, Maintenance, and Making Murals Last
- Frequently Asked Questions
Last Updated: September 17, 2026
Why High Resolution Wall Murals for Bedrooms Change the Whole Room
A bedroom mural does more than fill an empty wall. High resolution wall murals for bedrooms turn a plain surface into a focal point, and print clarity is what separates a mural that looks like art from one that looks like a blown-up photo. We print custom graphics at high resolution so the details hold up when you stand a foot away.
Print Clarity and Color Accuracy You Can See Up Close
Print clarity comes down to two things: the source file and the printer. A high-resolution image carries enough detail to fill a large wall without blurring. Color accuracy keeps the printed mural matching what you approved on screen.
Look for these markers of quality:
- High-resolution source files sized to your exact wall dimensions
- Eco-friendly ink that holds color without a chemical smell in a sleeping space
- Matte finish that reduces glare from lamps and windows
- Seamless image panels that line up with no visible gaps
Design Styles That Work: Nature-Inspired, Floral, and Abstract Murals
Nature-inspired mural designs bring the calm of the outdoors inside, and they suit almost any bedroom style. Landscape photography, forest scenes, and ocean views create large-scale scenery that makes a small room feel open. Floral and botanical patterns add softness and a sense of pattern without overwhelming the space.
3D and Depth-Enhancing Murals for Small Bedrooms
Depth-enhancing murals use perspective to make a wall feel farther away. A forest path that recedes into mist or a city skyline at dusk adds visual depth that tricks the eye into reading the room as larger. For a small bedroom, this is one of the smartest design moves you can make.
Peel and Stick Bedroom Murals vs. Traditional Wall Covering
Peel and stick bedroom murals use a removable adhesive backing, while traditional wall covering needs paste and a longer installation. Peel and stick can be a good fit for renters and anyone who wants to change the look without a permanent commitment.
| Feature | Peel and Stick | Traditional Wall Covering |
|---|---|---|
| Installation | DIY, no paste | Paste and smoothing tools |
| Removal | Peels off cleanly | Often damages the wall |
| Best for | Renters, quick updates | Permanent installations |
| Surface needs | Smooth, clean wall | Smooth, primed wall |
Best Practices for Mural Wall Preparation
Wall preparation decides whether your mural stays put, and it is the step most buyers underestimate. A clean, smooth, dry surface gives the adhesive a solid bond. Skip it and you risk bubbles, peeling corners, and a mural that fails within months. The technical variables below are what separate a mural that lasts a decade from one that lifts in a season.
Match the Surface to the Adhesive
Not every wall accepts every mural. Before you order, identify what you are sticking to:
- Painted drywall (smooth or satin finish): The most forgiving surface. Wipe it down, let it dry, and install.
- Painted drywall (flat or matte finish): Adhesive can grab the chalky paint layer instead of the wall. Test a small corner first; if paint lifts, seal it with a primer.
- Orange-peel or knockdown texture: The most common failure point. Adhesive only contacts the peaks, leaving air channels that turn into bubbles. A light sanding helps on shallow texture; deep texture needs a smooth liner panel or a skim coat.
- Brick, cinder block, or concrete: Porous and uneven. These need a primer-sealer and often a liner panel before any mural goes up.
- Fresh paint: Let it cure fully, typically several days to a week depending on humidity and product, before installing. Adhesive on uncured paint can pull the coating off the wall on removal.
- Wallpaper or previously papered walls: Remove old paper first. Adhesive over old paper rarely holds, and removal takes the old layer with it.
Check Moisture Before You Commit
Moisture is the silent mural killer. A wall that feels dry can still wick water vapor from behind, especially on exterior walls or below grade. Signs of a moisture problem include bubbling paint, a musty smell, or efflorescence (white powdery deposits). Fix the source first, grading, gutters, a vapor barrier, then let the wall dry completely. Installing over damp drywall traps moisture and grows mold behind the mural.
Prep Sequence That Works
Follow these steps before you install:
- Wash the wall with a mild detergent solution to remove dust, grease, and hand oils
- Rinse and let it dry completely, 24 hours is a safe minimum
- Fill nail holes and cracks with spackle, then let the filler dry fully
- Sand bumps and ridges smooth, then wipe away all dust with a tack cloth
- Prime bare or patched spots so the surface absorbs evenly
- Let fresh paint cure for the full recommended time on the can
- Confirm the surface is flat, not textured, and free of moisture
Why This Step Protects Your Investment
A mural is a large-format print, and the wall is its substrate. Prep failures show up as bubbles, curling edges, and seams that separate, all of which are installation problems, not print problems. Spending an extra hour on prep is the cheapest insurance you can buy for a custom-sized mural.
How to Install Wall Murals: A Step-by-Step Walkthrough
Learning how to install wall murals takes about an hour for a standard bedroom wall once the surface is ready. The process rewards patience over speed.
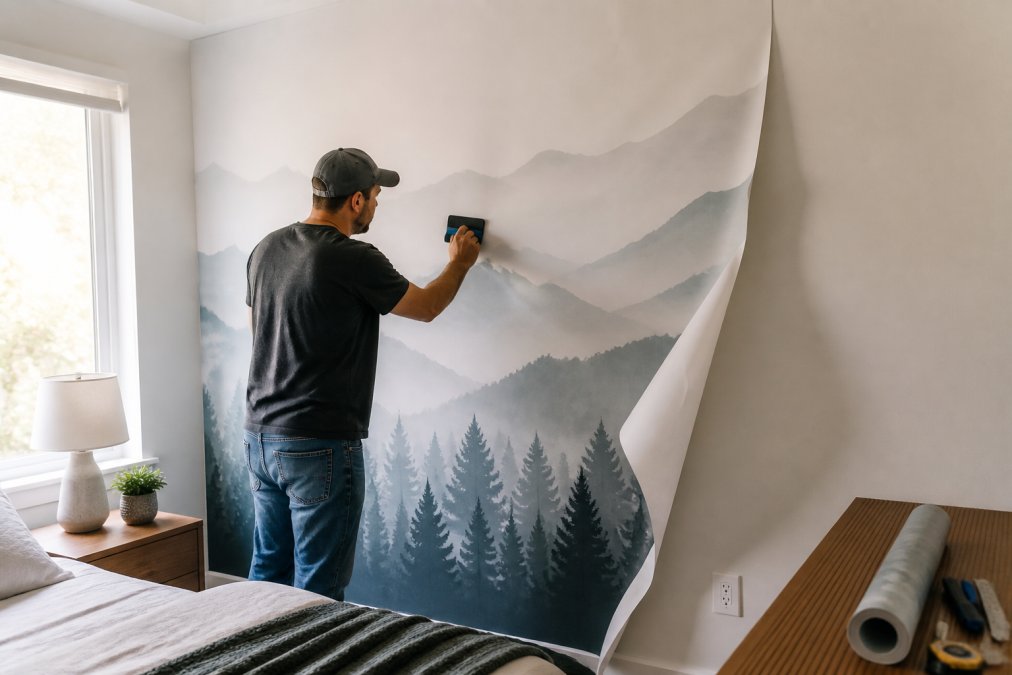
Here is the sequence:
- Measure and mark. Confirm your wall dimensions and mark a level vertical line as your starting point.
- Dry-fit the panels. Lay panels out in order before peeling any backing.
- Peel and align. Start at the top corner and press the first few inches into place.
- Smooth as you go. Work downward with a felt squeegee, pushing air toward the edges.
- Overlap seams slightly. Match the pattern repeat so the seamless image lines up.
- Trim the edges. Cut excess material with a sharp blade against a straight edge.
- Press the borders. Run your hand along all edges to seal the adhesive.
Custom Sizing, Materials, and What Drives the Cost
Custom sizing means your mural is printed to your exact wall dimensions, not cut down from a standard roll. This avoids awkward gaps and keeps the image proportional. Materials range from various fabrics to vinyl, and the choice affects both feel and durability.
Pricing depends on a few factors:
- Square footage of the wall
- Material type, such as non-woven or premium vinyl
- Custom design work if you want a bespoke image
- Finish, including matte or textured options
Lighting, Maintenance, and Making Murals Last
Lighting changes how a mural looks more than most people expect, and it is the variable competitors almost never explain. A high-resolution print shows its detail best under soft, even light. The same mural can look crisp under one lamp and washed out under another, and the difference is not the print, it is the light hitting it.
How Lighting Affects Perceived Resolution
Perceived sharpness is a function of contrast, and light controls contrast:
- Color temperature: Warm light (around 2700K, typical of bedside lamps) pushes yellows and reds forward and mutes blues. Cool light (around 4000K-5000K, common in overhead fixtures) does the opposite. A mural with fine blue detail can look soft under warm light even when the print is sharp.
- Direction: Raking light from a side lamp exaggerates wall texture and casts micro-shadows across the print, which reads as graininess. Even, diffused light from above or across the room preserves the detail.
- Intensity: Very bright direct light blows out highlights and flattens midtones, making a detailed image look like a flat poster. Dim light hides detail entirely.
- Glare: Glossy finishes reflect light sources back at the viewer, creating hot spots that mask the image. Matte finishes scatter light and keep the print readable at any angle.
Material Choice Drives Durability
Fade resistance and scratch resistance come from the material and ink, not the design:
- Non-woven fabric murals: Breathable, dimensionally stable, and resistant to tearing. They handle humidity better than paper and are a strong pick for bedrooms with varying moisture.
- Vinyl murals: The most washable and scratch-resistant option. Vinyl takes a damp cloth without damage, which matters in a room where furniture and hands brush the wall.
- Textured and canvas-look finishes: Add depth but trap dust in the weave, so they need more frequent gentle cleaning.
- Ink type: Pigment inks resist fading far better than dye inks under UV exposure. If a mural faces a bright window, pigment ink is worth the upgrade.
Cleaning Without Damaging the Print
Maintenance is simple if you match the method to the material:
- Dust with a dry microfiber cloth every few weeks to keep grit from abrading the surface
- For marks, wipe gently with a damp cloth and a drop of mild dish soap, never abrasive pads or solvents
- Blot, do not scrub, and let the surface air-dry
- Keep direct sunlight off the print where possible; sheer curtains cut UV without darkening the room
- Fix a lifting corner right away with light pressure before it spreads
Habits That Extend Mural Life
- Keep direct sunlight off the print where possible
- Clean with a soft cloth, never abrasive pads
- Fix a lifting corner right away with light pressure
- Avoid placing furniture that rubs against the surface
- Re-check seams and edges after the first humid season and press any that lift
Frequently Asked Questions
How much do high resolution wall murals for bedrooms cost?
Pricing depends on the wall dimensions, material, and design complexity. Murals are usually quoted per square foot, so a full accent wall costs more than a single panel. Custom sizing, non-woven or peel and stick material, and matte finish options all affect the total. For current pricing on your specific wall size, request a quote from Let's Print Big directly.
Are peel and stick murals durable enough for a bedroom?
Yes, when the wall is clean, smooth, and fully cured. Peel and stick bedroom murals use a removable adhesive that holds firmly on painted drywall but stays repositionable during installation. In hot, sunny rooms, keep murals out of direct all-day sun to slow fading and adhesive breakdown. Most quality murals last years with normal indoor conditions.
How do I choose the right resolution for a large wall mural?
Match resolution to viewing distance. A mural seen from across the room needs less detail than one behind a headboard you see up close. For large-scale scenery, look for high-resolution files with at least 150 DPI at final print size, and check print clarity on a small sample first. Blurry source images cannot be fixed by scaling.
What wall preparation do bedroom murals need before installation?
Walls should be clean, dry, and smooth. Fill nail holes, sand glossy paint, and let fresh paint cure for at least two weeks before applying any wall covering. Wipe dust with a damp cloth and let it dry fully. Textured walls may need a liner panel. Skipping prep is the top reason murals bubble or peel early.