
How to Clean Vehicle Surfaces Before Decals

Table of Contents
- Why Surface Prep Decides Whether Your Decals Last
- What to Clean a Car With Before Applying Decals
- How to Remove Wax From a Car Before Decals
- How Long to Wait After Washing a Car Before Applying Decals
- Tools for Applying Vehicle Decals and Prep Work
- Temperature, Humidity, and Surface Conditions That Affect Bonding
- Final Inspection: Checking Your Surface Before the Decal Goes On
- Conclusion
- Frequently Asked Questions
Last Updated: October 7, 2026
Why Surface Prep Decides Whether Your Decals Last
The decal itself is rarely the reason vinyl fails. Surface contamination is.
Adhesive only bonds to what it touches. Dust, silicone, and old wax sit between the vinyl and your clear coat, so the bond forms on the dirt instead of the paint.
At Let's Print Big, we ship every graphic weeded and masked, ready to apply. The variable we cannot control is your surface.
What to Clean a Car With Before Applying Decals
The best cleaner for decal prep is a mild dish soap solution for the initial wash, followed by isopropyl alcohol for the final wipe-down. Skip anything that leaves a film behind, because residue is the enemy of adhesion.
Paint prep is the process of removing contaminants so an adhesive can bond directly to the clear coat. It has three stages: wash, decontaminate, and degrease.
Cleaning Agents That Work and Those That Don't
Not every cleaner is safe for paint. Some leave behind exactly what you are trying to remove.
Safe options:
- Mild dish soap and water for the first wash
- Isopropyl alcohol at 70% strength for the final wipe
- A dedicated silicone-free degreaser for oily panels
- Deionized water for rinse and dilution
Avoid these:
- Wax-containing car wash soap
- "Wash and wax" combo products
- Silicone-based detail sprays
- Household glass cleaner with ammonia
The common mistake here is grabbing whatever is in the garage. A wash-and-wax product feels like a shortcut. It is actually a coating of wax you then have to strip off.
How to Remove Wax From a Car Before Decals
Removing wax is the step most people rush, and it is the one that ruins the install. Wax and paint sealants are designed to repel things, and adhesive counts as a thing.
Here is the order that works:
- Wash the panel with mild dish soap to lift loose dirt
- Dry it completely with a lint-free cloth
- Wipe the panel with isopropyl alcohol
- Let the surface flash dry
- Check with a clean towel for any slick spots
If the panel still feels slippery, repeat the alcohol wipe. Wax removal is done when the paint feels slightly tacky to a clean cloth, not slick.
Using Isopropyl Alcohol Safely on Paint and Glass
Isopropyl alcohol is the standard degreaser for vinyl work because it evaporates fast and leaves no residue. Use 70% strength, not 91%.
Apply it to a microfiber towel, not directly to the paint. Wipe in one direction and turn the towel often. On glass, alcohol works the same way.
One caution: work in the shade. Alcohol on hot paint evaporates before it can do its job.
How Long to Wait After Washing a Car Before Applying Decals
Wait until the surface is completely dry, which usually means 30 to 60 minutes in shade at moderate temperatures.
The real test is touch, not time. Run a clean, dry towel across the panel. If it slides freely with no drag or dampness, the surface is ready.
Humidity stretches the wait. On a muggy day, give it longer and check again before you peel the backing.
Tools for Applying Vehicle Decals and Prep Work
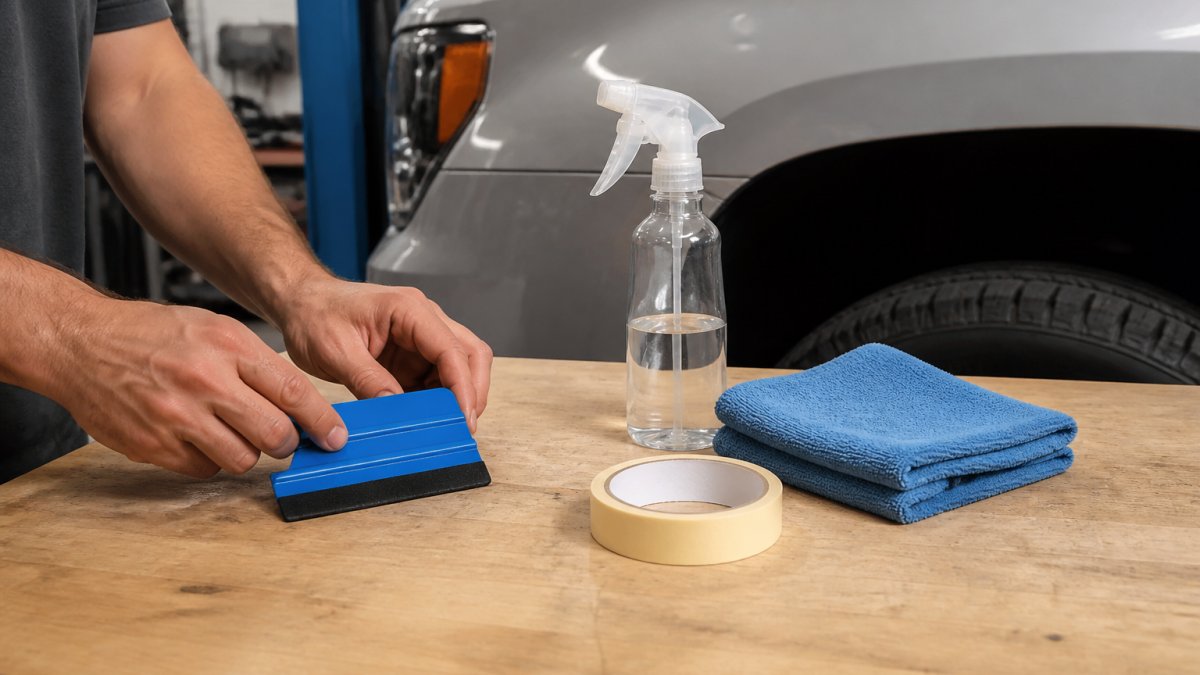
You need a short list, and every item earns its place. The right tools for applying vehicle decals keep the surface clean and the vinyl flat.
- Squeegee with a felt edge to push out air and application fluid
- Spray bottle for the slip solution
- Microfiber towels for drying and wiping
- Lint-free cloths for the alcohol pass
- Low-tack tape to position the graphic before you commit
A clay bar belongs in your kit too if the paint feels rough. Claying pulls embedded contaminant out of the clear coat before you wipe it down.
Temperature, Humidity, and Surface Conditions That Affect Bonding
Vinyl adhesive has a working range, and the panel, not the air, is what the adhesive actually touches.
Measure the panel, not the forecast. An infrared thermometer pointed at the fender or door gives you the real number in two seconds.
Humidity matters almost as much. Above roughly 70% relative humidity, moisture condenses on a cool panel faster than you can wipe it, and any film of water trapped under vinyl becomes a bubble or a lift point within weeks.
Surface Type Changes the Rules
Not every panel on the vehicle accepts the same prep. This is where most guides stop short.
- Clear coat (painted body panels): The standard wash, clay, and 70% isopropyl alcohol sequence applies. Clear coat tolerates alcohol well because it is a cured urethane. Avoid acetone, lacquer thinner, and any solvent listed as a paint reducer, they can cloud or soften the clear.
- Matte and satin finishes: No clay bar, no polishing, no alcohol-heavy wipe-downs. Matte clear lacks the gloss layer that hides micro-scratches, and alcohol can leave a chalky haze. Use a pH-neutral matte-safe cleaner and a distilled-water rinse, then a light wipe with a matte-specific prep spray. Test on a hidden edge first.
- Plastic trim, bumpers, and mirror housings: These are usually unpainted polypropylene or ABS. They hold mold release agent and plasticizer that bleed out over time, so a plain alcohol wipe is not enough. Wipe with a 50/50 isopropyl alcohol and water mix, then follow with a dedicated adhesion promoter designed for low-surface-energy plastics. Without the promoter, vinyl on bare plastic often lifts at the edges within a season.
- Glass: Alcohol works, but glass holds fingerprints and silicone from wiper blades. A two-pass wipe, one with glass cleaner, one with 70% alcohol, gives the cleanest bond.
- Chrome and polished metal: These are non-porous and slick. Clean with alcohol, then scuff lightly with a gray Scotch-Brite pad only if the manufacturer's instructions allow it. Do not scuff decorative chrome you want to keep shiny.
Quick Reference: Surface Temperature and Humidity
| Condition | Reading | Action |
|---|---|---|
| Surface temp | 70°F-80°F | Ideal, apply |
| Surface temp | 60°F-70°F or 80°F-90°F | Workable, work quickly, watch edges |
| Surface temp | Below 60°F | Warm panel gently with a heat gun on low, recheck |
| Surface temp | Above 90°F | Move to shade, cool, recheck |
| Relative humidity | Above 70% | Wait or move indoors |
| Visible condensation | Any | Stop, dry and recheck |
Final Inspection: Checking Your Surface Before the Decal Goes On
The last check takes two minutes and saves the whole install. Most guides skip it entirely, which is why so many DIY installs fail on contaminants the installer never saw. Do this inspection in the right light, with the right tools, and in the right order.
Set Up the Inspection
- Light: A bright LED work light held at a low, raking angle across the panel. Overhead light hides everything; side light reveals every speck.
- Touch: A clean, bare hand inside a thin nitrile glove. Skin oils from a bare hand can recontaminate the panel, so glove up before you touch.
- Tools: A clean microfiber towel, a spray bottle of 70% isopropyl alcohol, and a small plastic bag (a sandwich bag works) for the bag test.
The Contaminant-by-Contaminant Check
Work top to bottom so dust you dislodge does not fall onto a panel you already cleared.
- Grit and dust. With the raking light on, look for specks that survived the wipe. Run a gloved hand across the panel, any bump you feel is a particle that will telegraph through the vinyl as a visible pimple. Re-wipe with alcohol and a fresh microfiber.
- Wax and sealant residue. The bag test is the fastest way to find it. Slip your hand into a plastic sandwich bag and drag it across the panel. The plastic amplifies friction, so leftover wax feels slick and greasy while clean clear coat feels slightly tacky or squeaky. Slick spots get another alcohol pass.
- Embedded contaminants. If the bag test feels rough or gritty rather than slick, the clear coat has bonded contamination, industrial fallout, tree sap, or overspray. That is a clay bar job, not an alcohol wipe. Clay the panel, then re-wipe with alcohol.
- Moisture. Look for cool patches, faint fog, or a damp sheen near panel gaps and lower edges where water pools. A dry towel dragged across the panel should slide with no drag and leave no damp streak. If it does, wait longer.
- Paint defects. Chips, dents, rust blooms, and lifting clear coat at panel edges will all show through vinyl. Rust under a decal keeps spreading and will eventually push the vinyl off. Repair or seal the defect before you apply anything.
- Fingerprints and skin oils. After the final alcohol wipe, do not touch the panel with bare skin. A single fingerprint on a degreased panel is enough to create a lift point at the edge of the decal.
Pass or Fail
| Check | How to Test | If It Fails |
|---|---|---|
| Dryness | Dry towel slides with no drag | Wait longer, recheck |
| Wax residue | Bag test feels slick, not tacky | Repeat alcohol wipe |
| Grit | Gloved hand finds bumps | Re-wash and dry |
| Embedded contaminant | Bag test feels rough | Clay bar, then alcohol |
| Temperature | Infrared reads 70°F-80°F | Move to shade or warm gently |
| Paint condition | Look for chips, rust, lifting clear | Repair before applying |
| Skin oils | Visual, no prints under raking light | Re-wipe with alcohol |
Conclusion
The gap between a decal that lasts years and one that peels in months almost always comes down to prep. Clean the surface, strip the wax, confirm it is dry, and apply within the right temperature window.
When you are ready to order, Let's Print Big delivers high-resolution custom graphics with professional-grade print quality. Every order arrives weeded and masked for easy installation, backed by expert guidance and video tutorials, plus free shipping on qualifying orders.
Frequently Asked Questions
What should I clean a car with before applying decals?
Start with a pH-neutral car wash to remove loose dirt, then follow with a 50/50 mix of isopropyl alcohol and deionized water to strip oils and residue. Avoid household glass cleaners that contain ammonia or added waxes, since those leave a film that prevents the adhesive from bonding. A lint-free microfiber towel or cloth works best for the final wipe-down.
Do you need to use isopropyl alcohol before applying a vinyl decal?
Yes, isopropyl alcohol is the standard final wipe before decal application. It removes oils, silicone residue, and fingerprints that car wash alone leaves behind. Use a 50/50 dilution with deionized water, wipe in one direction with a clean lint-free cloth, and let the surface flash off completely before peeling the backing paper.
Can I use Windex to prep a surface for decals?
No. Most glass cleaners contain ammonia or surfactants that leave a residue on the clear coat, which weakens the adhesive bond and can cause premature lifting. Stick with isopropyl alcohol or a dedicated silicone-free prep spray. If you already used Windex, re-wipe the area with isopropyl alcohol before applying the decal.
How do you remove wax from a car before applying vinyl?
Use a silicone-free degreaser or a diluted isopropyl alcohol solution to strip wax and sealant from the paint. Wipe in overlapping passes with a clean microfiber towel, then follow with a second wipe using fresh solution. If the paint feels slick or water beads heavily, repeat the process until the surface has a dull, squeaky-clean feel.