
7 Personalized Wall Murals for Living Rooms That Wow

Last Updated: November 2, 2026
Quick Summary
Personalized wall murals for living rooms come in six sizes from 48 × 72 up to 120 × 180 inches and two materials: standard wallpaper or peel and stick wallpaper. Every design is available with 10 × 15 inch samples in both materials so you can check color and scale before ordering.
- Measure width at top, middle, and bottom and use the smallest number to size your mural.
- Murals wider than 48 inches ship in panels with a 1/2 inch image overlap for seam planning.
- Choose peel-and-stick if you rent or want the fastest, most repositionable installation.
- Wait the paint manufacturer's full cure time before applying peel-and-stick to freshly painted walls.
- Scale the largest bloom on floral murals to roughly the width of a sofa cushion.
Table of Contents
- Living Room Mural Ideas That Anchor the Whole Room
- 7 Personalized Wall Murals for Living Rooms Worth Building a Room Around
- Custom Photo Wall Mural: Turning Your Own Image Into a Feature Wall
- Wall Mural Size Guide: Measure Before You Order
- Material, Finish, and Cost Trade-Offs
- How to Install a Wall Mural Without Bubbles or Wrinkles
- Order a Sample and Lock In Your Living Room Mural
- Frequently Asked Questions
Living Room Mural Ideas That Anchor the Whole Room
Personalized wall murals for living rooms turn the largest blank surface in your home into the room's defining feature.
A common mistake is choosing artwork before choosing the wall. A mural sets the color palette, perceived depth, and focal point of everything else in the room.
Match the Mural to the Room's Job
A living room entertains, relaxes, and displays. If the sofa faces the wall, the mural is onstage every evening and must hold attention without overwhelming conversation.
Ask one question before browsing: what should people look at when they walk in? If the mural, go bold and large.
Color Palette and Visual Depth
Pull two or three colors from the mural into the room through pillows, a rug, or a throw, that repetition makes a large-scale design feel intentional rather than pasted on.
Landscape murals with a horizon line make a small room feel deeper because the eye reads distance.
7 Personalized Wall Murals for Living Rooms Worth Building a Room Around
Every mural below comes in six sizes from 48 × 72 up to 120 × 180 inches, printed on standard wallpaper or peel and stick wallpaper, with 10 × 15 inch samples in both materials.
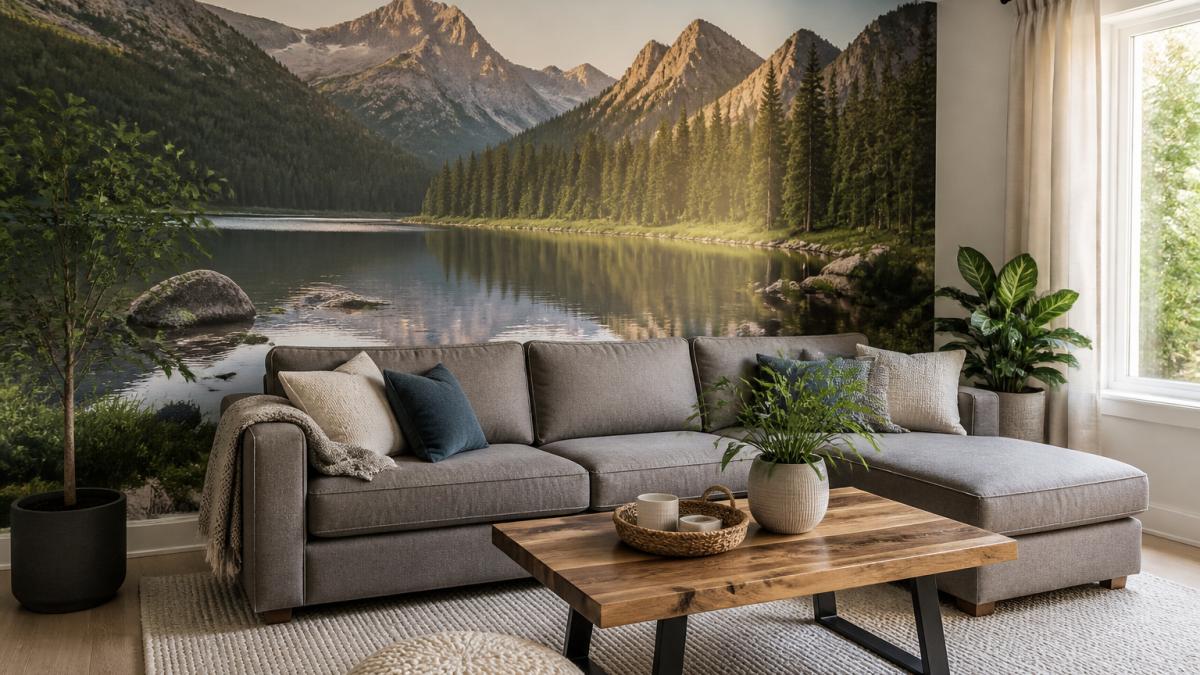
Golden Sunrise Alpine Lake Wall Mural
A turquoise alpine lake, emerald forests, and sunlit peaks under a coral and gold sky. The horizon line creates depth, suiting long walls behind a sofa.
Best for: lodge-inspired and nature-inspired living rooms with warm wood tones. Skip if: your room already has a strong view; two competing vistas fight each other.
Vibrant Tropical Botanical Garden Wall Mural
Coral and pink hibiscus, golden flowers, and emerald foliage. Floral murals add energy without a horizon, which makes them forgiving on walls with awkward proportions.
Best for: creative studios and living rooms that open onto a sunroom or patio. Skip if: the room is small and already busy with pattern.
Coastal Dune Serenity Wall Mural
Aqua waves, white sand, dune grasses, and a blue sky with coral clouds. Coastal designs read as calm because the palette stays cool and the composition stays horizontal.
Best for: coastal-inspired living spaces and sunrooms. Skip if: you want a moody, evening room; this mural is bright by design.
Coral Desert Arches Wall Mural
Coral sandstone arches, golden dunes, pink peaks, and a turquoise sky. Southwest scenery in contemporary color suits rooms with terracotta, clay, and boho accents.
Best for: boho and desert-modern living rooms. Skip if: your palette is cool gray or navy; the warm tones will clash.
Leaves Design 065, 037, and 017 Wall Mural Wallpaper
Three tropical leaf patterns that function as a large-scale design rather than a scene, the right call when you want texture and movement without a picture. All three come in canvas textured peel and stick or smooth non-pasted traditional wallpaper, and the traditional option requires wallpaper paste you supply.
Best for: rooms where furniture is the focal point and the wall should support it. Skip if: you want a literal landscape; these are pattern, not scenery.
Field Landscape Mural Wallpaper
An open field landscape that reads quiet and expansive. Field scenes are the safest choice for a first mural because they work with almost any furniture style and do not date.
Best for: first-time mural buyers and neutral rooms. Skip if: you want a dramatic statement wall.
Blue and White Textured Art and Marble Design 094
Textured art and marble designs deliver the modern pattern and textured effect look without a subject. Marble reads upscale in a way paint cannot, and blue and white textured art suits rooms with crisp, tailored furniture.
Best for: modern and transitional living rooms. Skip if: your room leans rustic; the finish is polished, not earthy.
| Mural | Style | Best Room | Statement Level |
|---|---|---|---|
| Golden Sunrise Alpine Lake | Landscape | Lodge, nature-inspired | High |
| Vibrant Tropical Botanical Garden | Floral | Bright, sunlit rooms | High |
| Coastal Dune Serenity | Coastal | Sunrooms, coastal spaces | Medium |
| Coral Desert Arches | Southwest | Boho, desert-modern | Very high |
| Leaves 065, 037, 017 | Botanical pattern | Furniture-led rooms | Medium |
| Field Landscape | Nature landscape | Neutral, first-time buyers | Low |
| Blue/White Textured Art, Marble 094 | Modern texture | Modern, transitional | Medium |
Custom Photo Wall Mural: Turning Your Own Image Into a Feature Wall
A custom photo wall mural is printed from your own image rather than a stock design.
The photo has to survive enlargement. A phone snapshot that looks sharp on a screen can soften when blown up across a wall, so send the highest-resolution file you have.
You can choose the substrate, the size, and the panel layout. That combination makes a mural personal rather than merely decorative.
Wall Mural Size Guide: Measure Before You Order
Most mural guides tell you to measure width and height and stop there. That falls apart the moment your living room wall has a window, fireplace, doorway, or sloped ceiling, which describes most living rooms. This guide covers the full measurement job, including choosing image scale so the artwork reads correctly from where people actually sit.
Start With the True Wall, Not the Room
Measure the wall you intend to cover, not the room's overall dimensions. Use a steel tape, work in inches, and sketch the wall. Measure width at the top, middle, and bottom and use the smallest number; measure height at the left, center, and right and use the smallest number.
Golden Sunrise Alpine Lake Wall Mural →
- Measure width at top, middle, and bottom; record the smallest
- Measure height at left, center, and right; record the smallest
- Note baseboard height and crown molding depth and subtract both
Measuring Around Windows, Doors, and Fireplaces
A mural does not have to stop at an obstacle. You have three options, and the right one depends on the design.
Option 1, Cover the full wall and cut around the obstacle. Order the full wall size and trim around window and door trim with a sharp blade after installation.
Option 3, Split the wall into panels. For a centered window, measure the left and right segments separately and order two murals, or order one oversized mural and plan panel seams to land on the window trim. Seams hidden behind trim are invisible; seams in the middle of a sightline are not.
For doorways, measure from the door casing to the nearest corner and from the casing to the ceiling.
Sloped Ceilings, Stairs, and Odd Geometry
Sloped ceilings and cathedral walls are common in living rooms and are where standard sizing charts fail. Measure the tallest and shortest points of the wall and decide which one the mural should respect.
- Tallest-point sizing: order to the tallest point and trim the top edge along the slope after installation. Best for landscapes and abstracts where the top of the image is sky or texture.
- Shortest-point sizing: order to the shortest point and leave painted wall above the mural on the tall side. Best for designs with a defined top edge, such as a framed botanical or a geometric pattern.
- Custom trapezoid panels: for a steep slope, ask about custom panel shapes rather than forcing a rectangle into a triangle.
If your wall includes a staircase or a half-wall, measure each flat plane separately and treat them as separate murals.
Choosing Image Scale for the Wall
Size is how many square inches you cover; scale is how large the elements within the design appear.
Stand where people sit most often, usually the sofa, and look at the wall.
For floral and botanical designs, scale the largest bloom to roughly the width of a sofa cushion.
Matching Your Numbers to Available Sizes
Murals run from 48 × 72 up to 120 × 180 inches in a consistent 3:2 width-to-height ratio. Compare your smallest width and height to that list. If your wall falls between sizes, contact us about custom sizing rather than ordering short. Murals wider than 48 inches are printed in panels with a 1/2 inch image overlap; plan panel seams away from the room's main sightline, behind furniture, or on a window or door trim line.
Material, Finish, and Cost Trade-Offs
In a living room, the substrate decides how the wall looks, how hard the install is, whether you can take the mural with you when you move, and what the project actually costs. Here is the honest comparison.
The Three Substrates, Compared
| Factor | Peel-and-Stick (canvas textured) | Paste-the-Wall (smooth) | Traditional Non-Pasted (smooth) |
|---|---|---|---|
| Adhesive | Pre-applied, removable backing | Paste applied to wall | Paste applied to paper; you supply paste |
| Finish | Canvas texture, slight tooth | Smooth, painted-on look | Smooth, painted-on look |
| Best wall condition | Smooth, painted, fully cured drywall | Smooth, primed drywall | Smooth, primed drywall |
| Removability | Removable; renter-friendly | Removable with effort and wall prep | Removable with effort; may damage poorly prepped walls |
| Installation difficulty | Lowest, repositionable during install | Moderate, paste and book | Highest, paste, book, and trim |
| Moisture tolerance | Low; avoid bathrooms and damp walls | Moderate | Moderate |
| Repairability | Replace a panel | Patch and reprint a panel | Patch and reprint a panel |
Choose peel-and-stick if: you rent, you want the fastest install, your wall is smooth and painted, or you may want to change the design in a few years.
Choose paste-the-wall if: you own the home, you want the flattest possible finish for a large landscape, and you are comfortable with a paste-and-book process.
Choose traditional non-pasted if: you are matching existing wallpaper in the room or you prefer a paper-backed product.
Wall Condition Decides More Than Material
A smooth, fully cured, painted wall is the ideal surface for all three substrates. Anything else changes the recommendation:
- Freshly painted walls: wait the full cure time recommended by the paint manufacturer, often several weeks, before applying peel-and-stick. Trapped solvent under the adhesive causes bubbling and failure.
- Textured or orange-peel drywall: peel-and-stick will telegraph the texture and may not adhere fully. A paste-the-wall product bridges light texture better.
- Wallpaper to be covered: do not install over old wallpaper. Remove it, wash the wall, and prime.
What the Project Actually Costs
Costs vary with size, material, and customization. A realistic budget can account for these line items:
- Mural itself, scales with square footage and substrate.
- Samples, a 10 × 15 inch sample in each candidate material is the cheapest insurance in the project. Budget for two if undecided between substrates.
- Wall prep, filler, primer, sandpaper, and painter's tape. Small cost, large effect.
- Tools, felt squeegee, sharp blades, straightedge, level, and a paste kit if you choose a paste product. Many households already own half of this.
- Professional installation, optional, but worth pricing for tall walls, sloped ceilings, or traditional non-pasted paper.
Custom dimensions are available on request. The biggest budget mistake is ordering the wrong size to save money, a mural that runs short cannot be extended, and a reprint costs more than the sample that would have prevented it.
Finish and the Living Room
Look at both samples in morning and evening light before deciding.
How to Install a Wall Mural Without Bubbles or Wrinkles
Clean, smooth, dry walls decide the outcome more than technique does. Wipe the wall down, let it dry fully, and fill any dents before you unroll anything. Then follow this sequence:
- Unroll the mural and let it relax flat for a few hours
- Mark a vertical plumb line with a level
- Dry-fit the first panel and check alignment before removing any backing
- Peel a few inches of backing and press from the center outward
- Smooth with a felt squeegee, working bubbles toward the edges
- Overlap panels by the half inch provided and double-check the seam
- Trim edges with a sharp blade against a straightedge
Test alignment before removing the backer on peel and stick installations, because once it touches the wall, repositioning gets harder. For step-by-step beginner guidance, see these DIY wall mural installation tips.
Order a Sample and Lock In Your Living Room Mural
The gap between a screen preview and a printed wall is real, and a sample closes it.
Start with the Golden Sunrise Alpine Lake Wall Mural for a landscape focal point, browse the Vibrant Tropical Botanical Garden Wall Mural for a floral statement, or see the Coastal Dune Serenity Wall Mural and Coral Desert Arches Wall Mural for coastal and Southwest options.


Frequently Asked Questions
What are the best wall mural ideas for a living room?
It depends on the room's job. A landscape mural such as Golden Sunrise Alpine Lake adds depth behind a sofa and makes a long wall feel wider. A botanical design like Vibrant Tropical Botanical Garden suits bright, social rooms. Coastal Dune Serenity works in rooms that get strong afternoon light, while Coral Desert Arches gives a bold, contemporary feature wall. Pick the mural last, after rugs and upholstery, so the color palette ties together instead of competing.
Can you make a wall mural from your own photo?
Murals are printed to order, and 10 x 15 inch samples are available in both materials so you can check color and material before committing to a full wall.
How do I choose the right size mural for my living room wall?
Measure the wall's height and width in inches, then subtract for baseboards, crown molding and any outlets you want to avoid. Let's Print Big murals come in six sizes from 48 x 72 to 120 x 180 inches, all at a 3:2 width-to-height ratio, so pick the size that covers your measured area without stretching the artwork. Murals wider than 48 inches arrive in panels with a 1/2 inch image overlap, which you trim during installation.
Are peel-and-stick wall murals easy to install?
Peel-and-stick murals are the friendlier option for a first install. The backing releases without paste, and the canvas-textured peel-and-stick material is forgiving if you need to lift and reposition a panel. Prepare the wall first: clean it, let it dry, and check for peeling paint. Test-align each panel before you remove the backer, and follow the included instructions. Standard wallpaper murals need wallpaper paste and a smoother learning curve, so reserve those for walls you plan to keep covered.
Can wall murals be removed without damaging the wall?
Peel-and-stick murals are designed to be removable, which makes them the practical choice for renters or anyone likely to redecorate. Removal is easier when the wall was properly prepared and painted with a sound, cured finish before installation. Standard wallpaper murals applied with paste are a longer-term commitment and usually need more careful removal. If you rent, order a sample first, confirm the material with your landlord, and keep the installation instructions for reference.
Your living room wall is the largest surface you will ever decorate, and guessing at the size or material is the fastest way to waste the effort. Let's Print Big prints each mural to order in six sizes and two materials, ships samples so you can check color in your own light, and includes installation instructions with every order. Get started with Let's Print Big and turn that blank wall into the room's best feature.
