
DIY Wall Mural Installation Tips for Beginners

Table of Contents
- What You'll Need Before Starting Your Wall Mural Installation
- How to Prepare a Wall for Wallpaper and Mural Installation
- Measuring Your Wall and Planning Mural Panel Placement
- Wall Mural Panel Alignment Tips for a Seamless Finish
- Installing Peel-and-Stick Wallpaper Tools and Techniques
- Troubleshooting Bubbles, Wrinkles, and Peeling Edges
- How Long Does It Take to Install a Wall Mural
- Frequently Asked Questions
Last Updated: October 9, 2026
What You'll Need Before Starting Your Wall Mural Installation
Wall mural installation doesn't require a professional contractor or expensive equipment. Start by gathering the right tools and materials, and you'll set yourself up for success.
Here's what you'll need:
- Measuring tape (at least 25 feet)
- Level (2-4 feet long works best)
- Straight edge or ruler
- Pencil or chalk for marking
- Squeegee or smoothing tool
- Utility knife or craft knife
- Ladder or step stool
- Damp cloth or sponge
- Dry towel
- Painter's tape (optional, but helpful)
Your wall mural from Let's Print Big arrives weeded and masked, which means the design is already separated from excess backing and ready to apply. This saves you hours of prep work.
Beyond tools, you'll need a clean, dry wall surface and about 2-4 hours of uninterrupted time, depending on mural size. Working with a helper makes the process faster, but it's entirely possible to do alone if you take your time.
How to Prepare a Wall for Wallpaper and Mural Installation
Wall preparation is the most important step. A poorly prepared wall leads to bubbles, peeling edges, and a mural that won't last. Spend extra time here.
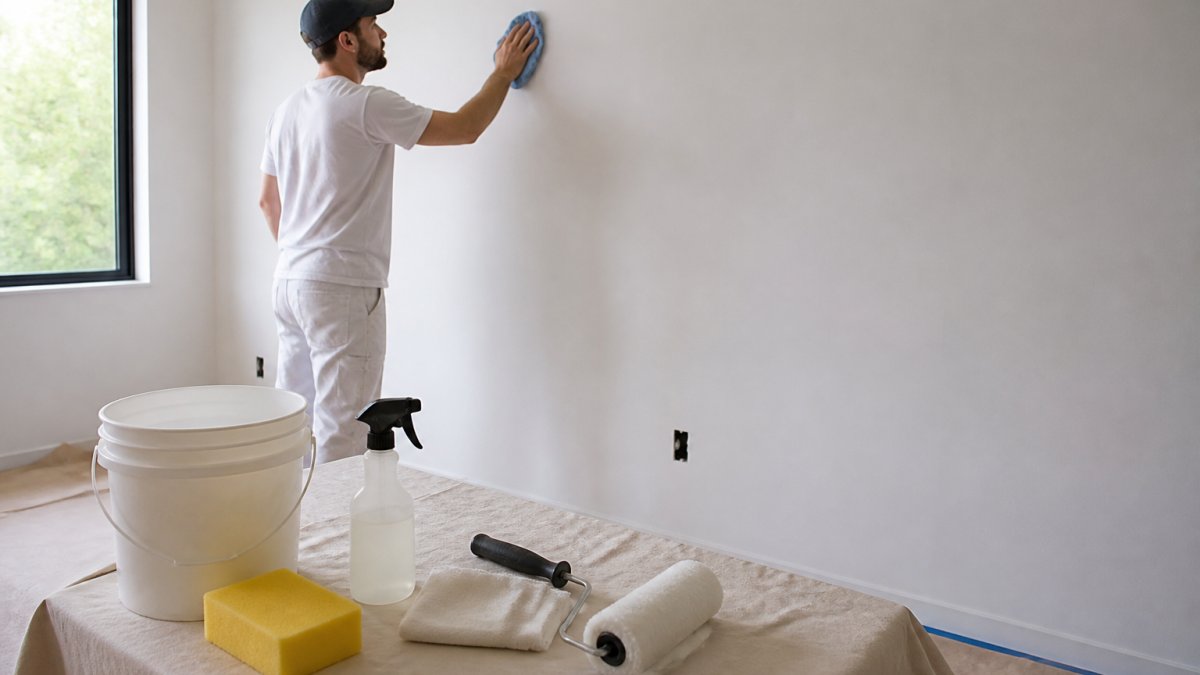
Most guides tell you to "clean and dry the wall" and stop there. That advice fails the moment your wall isn't a perfectly smooth, fully cured, flat-painted surface. Below is how preparation actually changes by surface type, the part beginners get wrong most often.
Start With a Surface Assessment
Run your hand across the wall and answer four questions before you touch a cloth:
- Is the paint loose or chalky? Flaking or powdery paint means the mural will bond to paint, not to the wall, and the paint will fail first.
- Is the surface flat, or does it have texture? Orange-peel, knockdown, popcorn, and cinder block all behave differently.
- How old is the paint? Fresh paint needs to cure, not just dry.
- Are there holes, cracks, or prior patches? These telegraph through thin mural film.
Preparation by Surface Type
Flat or matte painted drywall (the easiest surface). Dust with a damp cloth and mild soap, rinse, and let it dry fully.
Semi-gloss, gloss, and enamel paint. These are the surfaces where murals peel.
Freshly painted walls. Latex and acrylic paints need to cure, not just feel dry to the touch.
Textured walls (orange-peel, knockdown, popcorn). Adhesive cannot make full contact across a textured profile, so bubbles and lifted edges are more likely.
Cinder block, brick, and concrete. These are porous and uneven. Seal with a masonry primer or wall-size liner to create a smooth, non-porous surface.
Damaged or patched walls. Fill holes and cracks with spackle, let it dry completely, sand flush, and spot-prime the patches. Unprimed spackle is chalky and will not hold adhesive.
Clean, Dry, and Confirm
After surface-specific prep, clean the full coverage area with a damp cloth and mild soap. Pay extra attention to corners and edges, where dust collects. Let the wall dry completely, a damp wall causes adhesive failure. In humid conditions, a fan speeds drying.
Measuring Your Wall and Planning Mural Panel Placement
Accurate measurements prevent crooked panels and wasted material. Take your time with this step.
Measure the width and height of the wall space where your mural will hang. Write these numbers down. Measure twice to confirm accuracy.
Next, determine your starting point. Most people start in the center of the wall and work outward, or start at the top-left corner.
Mark a light vertical line down the center of your wall using a level and pencil. This plumb line serves as your alignment guide.
If your mural spans multiple panels, number them on the back before you start. This prevents confusion about panel order.
Lightly mark the top edge of where your first panel should go using painter's tape or a pencil line.
Wall Mural Panel Alignment Tips for a Seamless Finish
Alignment determines whether seams are invisible or visible. Poor alignment ruins the final look.
Position your first panel carefully. Align the top edge with your marked line. Use a level to verify it's perfectly straight before pressing down.
Start at the top and work downward, using a squeegee to smooth as you go. Apply gentle pressure, working from the center outward.
For multi-panel murals, overlap panels slightly if instructed. The overlap allows you to trim both layers together for a seamless seam.
After each panel, step back and check alignment. Crooked panels become obvious quickly.
Keep edges tight and seams aligned. Gaps between panels are visible and ruin the seamless finish. Press firmly along all seams.
Installing Peel-and-Stick Wallpaper Tools and Techniques
Peel-and-stick backing makes installation straightforward. The adhesive is pre-applied and activates when you apply pressure.
Start by peeling back a corner of the backing paper. Don't remove it all at once. Peel only 6-12 inches at a time.
Align the exposed portion with your marked guide line. Press firmly, working from top to bottom.
Peel back another section of backing and repeat.
Work slowly. Rushing causes bubbles and wrinkles. Take breaks between panels if needed.
When applying adhesive-backed murals, maintain consistent pressure. A squeegee or hard plastic card works well. Avoid metal tools that might scratch the surface.
For best results, apply Let's Print Big wall murals in a temperature-controlled environment. Cold temperatures slow adhesive activation. Warm rooms (65-75°F) are ideal.
Troubleshooting Bubbles, Wrinkles, and Peeling Edges
Even careful installation sometimes produces bubbles, wrinkles, gaps, or lifted edges. The fix depends on the symptom and on how long the mural has been up. Work through the matching entry below before you start pulling panels off the wall.
Bubbles
Small bubbles (under about an inch). Most flatten on their own within 24-48 hours as the adhesive fully sets. Leave them alone and check back.
Stubborn or larger bubbles. Prick the bubble at its edge with a pin or needle, then smooth the air out toward the hole with your squeegee. The pinhole is usually invisible once the adhesive cures.
Many bubbles across a panel. This usually means trapped air from pressing the whole panel down at once, or a dusty wall. Lift the panel back to the last smooth section, clean the wall again, and reapply in 6-12 inch increments.
Wrinkles and Creases
Wrinkles come from applying too much pressure too fast, or from stretching the material while positioning it. Carefully lift the wrinkled section back to the nearest flat point, then reapply slowly, smoothing from the center outward. A crease that has already set into the film may not fully disappear, repositioning early is far easier than fixing a set crease.
Crooked Panels
Step back after every panel. A panel that looks straight up close is often visibly off from a few feet away. If a panel is crooked and the adhesive has not fully bonded, lift it and realign to your plumb line. Once the adhesive has set, repositioning risks stretching the print, in that case, it is usually better to accept a small offset than to damage the panel.
Gaps and Separated Seams
Gaps between panels are visible and break the seamless look. Press firmly along the seam for about 30 seconds to encourage contact. If a gap remains, check whether the panels were aligned to the same plumb line. For butt seams that have opened slightly, a small amount of matching touch-up or a carefully trimmed sliver can close the gap, but prevention through accurate alignment is the real fix.
Peeling Edges
Peeling edges mean the adhesive never made full contact. Press the edge firmly for 30 seconds. If it lifts again, the cause is usually one of three things: a dusty or glossy wall, a damp wall, or a curved corner where flat adhesive cannot grip. For corners, make a relief cut so the material can wrap without pulling. If your product allows additional adhesive, lift the edge, apply a thin bead, and press again.
Repositioning and Removal
Peel-and-stick murals can typically be repositioned if you lift them slowly and soon after application, before the adhesive fully cures. Once cured, removal means peeling slowly at a low angle, warming the wall slightly with a hair dryer on low if the material resists, never a heat gun, which can damage both adhesive and print. Residual adhesive usually comes off with warm soapy water or a mild adhesive remover. Paste-the-wall murals are not repositionable once the paste sets.
How Long Does It Take to Install a Wall Mural
Installation time depends on mural size and your experience level. A single-panel mural takes 30-60 minutes. Multi-panel murals take 2-4 hours.
Your first mural may take longer as you learn the process. The second and third murals go faster once you understand the technique.
Factor in preparation time. Wall cleaning and drying can add 1-2 hours depending on wall condition.
Plan for a full afternoon or morning. Don't rush. Hurrying causes mistakes that take longer to fix than taking your time initially.
If you're working alone, expect the longer timeframe. A helper speeds the process by holding panels and spotting alignment issues.
Installing a wall mural is achievable for anyone willing to prepare properly and follow the steps carefully. Our wall murals arrive weeded and masked, ready to apply, which eliminates the hardest part of the job.
Frequently Asked Questions
How do you prepare a wall before installing a mural?
Start by cleaning the wall thoroughly with a damp cloth and mild soap to remove dust, dirt, and debris. Allow the wall to dry completely, moisture prevents proper adhesion. Fill any holes or cracks with spackling compound and sand smooth once dry. If the wall is glossy or has old paint, lightly sand it to help the mural adhere better. Check that the surface is flat and even; uneven walls can cause gaps and peeling edges. For textured walls, consider applying a primer or primer-sealer designed for wallpaper installation to create a smoother base for your wall mural.
Can you install a peel-and-stick wall mural by yourself?
Yes, you can install a peel-and-stick wall mural solo, though having a helper makes alignment easier, especially for larger panels. Start by measuring and marking your plumb line before peeling any backing. Work methodically from one corner, smoothing as you go to avoid trapping air bubbles. Use a squeegee or smoothing tool to press out bubbles as you apply each section. Take your time, rushing increases the risk of wrinkles and misalignment. If you make a mistake, peel-and-stick murals are forgiving and can be repositioned, so don't panic if the first panel isn't perfect.
How do you smooth bubbles and wrinkles out of a peel-and-stick mural?
Work from the center outward using a squeegee or plastic smoothing tool, applying firm, even pressure. For small bubbles, use a pin or needle to poke a tiny hole at the edge of the bubble to release trapped air, then smooth over the spot. For wrinkles, lift the affected area slightly and reapply, smoothing again from the center outward. If a section is badly wrinkled, you can carefully peel it back and reapply it. Avoid aggressive scrubbing, which can damage the vinyl. Patience and steady pressure work better than force; most bubbles and wrinkles disappear within 24 hours as the adhesive sets.
How long does it take to install a wall mural?
Installation time depends on mural size and your experience level. A small single-panel mural (under 50 square feet) typically takes 1 to 3 hours for a beginner. Larger multi-panel murals can take 4 to 8 hours or more. Plan extra time for wall preparation, cleaning, drying, and priming can add 1 to 2 hours. Working with a helper generally reduces installation time by 25 to 40 percent. Don't rush; taking your time to measure carefully, align panels, and smooth out bubbles prevents costly mistakes and ensures a professional finish.