
How to Put Vinyl Decals on Car Windows

Last Updated: November 8, 2026
Quick Summary
Yes, you can put vinyl decals on car windows, and glass is one of the best surfaces on the vehicle for them because it is smooth, non-porous, and holds adhesive better than paint or plastic trim. Use automotive-grade vinyl and clean the glass with isopropyl alcohol first so the decal stays flat and peels off clean.
- Automotive-grade vinyl is cast film with UV-resistant adhesive; craft vinyl shrinks and lifts at the edges.
- A standard decal install takes about 15 to 30 minutes, and you should work in shade on cool glass.
- Apply decals to the glass, not to aftermarket tint film, or removal can tear the tint.
- Keep decals off defroster lines, antenna grids, sensor windows, and the rear wiper's path.
- Warm a decal with a hair dryer on low and peel at a low angle to remove it without residue.
Table of Contents
- Can You Put Vinyl Decals on Car Windows?
- Tools and Materials You Need Before You Start
- How to Apply Vinyl Decals to Car Windows Step by Step
- Inside or Outside Car Window Decals: Which Way to Apply
- Vinyl Decals on Tinted Windows: What to Know
- Rear Windows, Defroster Lines, and Driver Visibility
- How to Remove Stickers From Car Windows Without Residue
- Pick Your Decal and Get It Shipped Ready to Apply
- Frequently Asked Questions
Can You Put Vinyl Decals on Car Windows?
Yes, you can put vinyl decals on car windows, and the glass is one of the best surfaces on the whole vehicle for them. Glass is smooth, non-porous, and holds adhesive far better than paint or plastic trim.
The catch is in the details. Glass expands and contracts with heat, rear windows carry defroster lines and antennas, and side windows roll up and down. Most installation failures come down to using the wrong vinyl or skipping surface prep.
Below, we'll show you exactly how to apply vinyl decals to car windows so they sit flat, stay put, and come off clean when you want them gone.
Automotive-Grade Vinyl vs. Craft Vinyl
Automotive-grade vinyl is a cast vinyl made for outdoor vehicle use, with UV-resistant adhesive and a film that stretches and conforms to curves. Craft vinyl is a thinner calendered film sold for scrapbooks, signs, and home projects.
The difference matters on a car. Craft vinyl shrinks slightly over time, which lifts edges. It also breaks down under sun and heat much faster. On glass, a lifting edge catches wind and water, and the whole decal starts to peel.
Here is how the two compare:
| Feature | Automotive-Grade Vinyl | Craft Vinyl |
|---|---|---|
| Made for | Outdoor vehicle use | Indoor and paper crafts |
| Heat and UV resistance | Built for years in the sun | Fades and dries out fast |
| Edge behavior | Stays flat on curves | Tends to lift and curl |
| Best use | Car windows, body panels | Signs, cards, decor |
A good rule: if the decal will sit in the sun, buy vinyl rated for vehicle use. If you are weighing suppliers and want to know what separates a durable film from a cheap one, this side-by-side supplier comparison breaks down the points that actually affect how long a decal lasts.
Tools and Materials You Need Before You Start
Gather everything first, because you do not want to stop mid-install to hunt for a squeegee.
What you need:
- Automotive-grade vinyl decal, weeded and masked
- Transfer tape if your decal is not pre-masked
- Squeegee or a stiff plastic card wrapped in a cloth
- Isopropyl alcohol or a glass cleaner without ammonia
- Lint-free cloth or paper towels
- Spray bottle with water and a drop of mild soap
- Tape measure and a strip of masking tape for alignment
- Weeding tool or a pin for small details
How to Apply Vinyl Decals to Car Windows Step by Step
The full process takes about 15 to 30 minutes for a standard decal. Work in shade, on a day when the glass is not hot to the touch, since vinyl gets soft and stretchy in direct sun.
Here is the sequence we recommend.
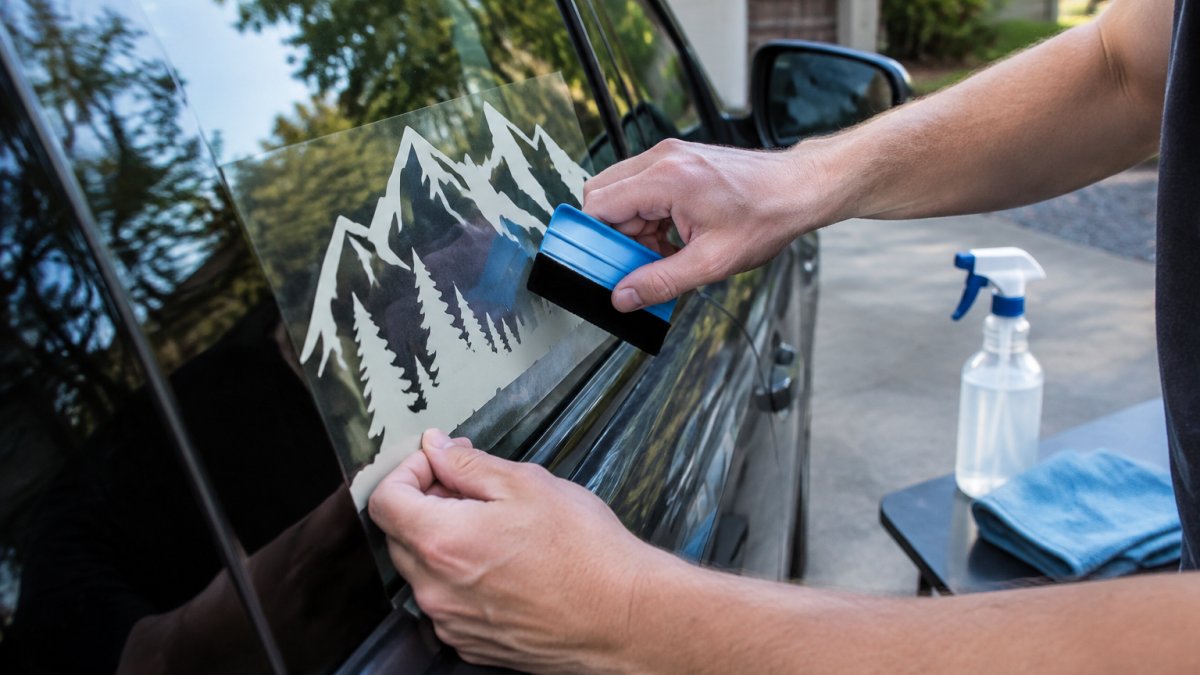
Clean, Measure, and Position the Decal
Wash the glass with soapy water, then wipe it down with isopropyl alcohol. Do not skip the alcohol step. Glass can carry a thin film of oil and road grime, so cleaning with alcohol after soap helps adhesion.
Next, measure. Use masking tape to mark the corners where the decal will sit, then step back and look from a few feet away before you commit. Repositioning tape is easy; repositioning a decal that has already grabbed the glass is not.
Use Transfer Tape and Squeegee Out Air Bubbles
Peel the backing paper off your decal, keeping the transfer tape attached to the face of the design. The transfer tape holds all the pieces in alignment while you move it.
Set the decal on the glass and press it down from the center outward. Use your squeegee or card in firm, overlapping strokes. Push air toward the nearest edge, never back into the middle.
Then peel the transfer tape back slowly at a sharp angle. If a small piece lifts with the tape, lay it back down and press it with your thumb.
Watch out: avoid picking at bubbles immediately after install, as this can stretch the film.
Inside or Outside Car Window Decals: Which Way to Apply
Outside car window decals are the standard for most graphics. The vinyl sticks to the exterior face of the glass, where it is easy to reach, easy to clean, and easy to remove.
Inside car window decals go on the interior face, which protects the graphic from weather, car washes, and road debris. Because interior decals are exposed when you clean the glass, keeping the window streak-free around the graphic takes care, as Heroes Car Wash notes.
One catch with inside application: the design must be printed in reverse, mirrored, so it reads correctly from outside.
Vinyl Decals on Tinted Windows: What to Know
Vinyl decals on tinted windows work fine, with one rule: apply the decal to the glass, not to the tint film.
The distinction matters because aftermarket tint is a thin polyester film held on by its own adhesive layer. A decal applied directly over that film creates two adhesive bonds stacked on each other.
A few practical notes:
- Let new tint cure before adding anything on top. Most tinters recommend waiting several days to a week after installation so the film's adhesive can fully bond and any trapped moisture can escape. A decal applied during that window can trap moisture under the tint and cause haze or bubbles.
- Apply outside when possible. On a window with aftermarket film on the interior, an exterior decal never contacts the tint at all. That is the safest configuration.
- Avoid ammonia-based cleaners near tint. Ammonia can cloud aftermarket film over time. Use an ammonia-free glass cleaner or isopropyl alcohol on a lint-free cloth.
- **** A light mist of soapy water lets the film slide into position and squeegees out more cleanly, which reduces the chance of pressing hard enough to mar the tint underneath.
- Do not use a razor blade, scraper, or abrasive pad anywhere near tinted glass. Even a plastic scraper can catch an edge of film.
If you must remove a decal stuck directly to aftermarket tint, warm it gently with a hair dryer on low and peel at a low angle, close to the glass.
For factory-tinted glass, none of the film concerns apply.
Rear Windows, Defroster Lines, and Driver Visibility
Rear glass is the trickiest surface on the vehicle.
For a large rear decal, a wet application method can help.
Placement rules that save you a repair bill:
- Keep the decal off the defroster grid where you can. A decal that covers the lines still lets them heat, but the trapped heat and the adhesive bond make later removal riskier. If the design must cross the grid, choose a perforated or thinner film and plan to leave it in place.
- Stay clear of antenna grids and sensor windows. Many rear windows have a separate antenna pattern, often near the top, and some vehicles have a camera or rain sensor behind the glass. Covering those can degrade radio reception or driver-assist function. Check the owner's manual for sensor locations before you place anything.
- Leave the top edge and the area around the third brake light clear. Required safety equipment and markings should stay unobstructed.
- Do not cover the rear wiper's path on vehicles that have one. The wiper will catch the edge of the film and peel it.
Visibility is the other concern. State laws on window tint and obstruction vary, and many restrict how much of the windshield and front side windows can be covered.
A perforated rear window graphic solves the visibility problem neatly. Our Scary Tiger Glare rear window decal uses 50/50 perforated vinyl, which provides heat reduction and privacy.

Watch out: never use a razor blade, scraper, or abrasive pad on a rear window with defroster lines. One slip cuts a line, and that repair costs far more than the decal did.
How to Remove Stickers From Car Windows Without Residue
Removal is easier than most people expect. Warm the film with a hair dryer on low, holding it a few inches away for a minute. The adhesive softens and the decal peels up in one piece.
For leftover glue, dab isopropyl alcohol or a citrus-based adhesive remover onto a cloth, let it sit for a minute, wipe, then clean the glass with soapy water.
Pick Your Decal and Get It Shipped Ready to Apply
The install is the easy part once the vinyl is right.
For a custom look, our custom vehicle window decal lets you upload your own artwork and size it to your glass. If you want a full rear window statement, the desert landscape rear window graphic covers the glass edge to edge with the same perforated vinyl.

Not sure what design fits your truck? Browse standout flag decals for trucks for ideas, or follow our six-step guide to designing custom Jeep graphics online if you want to build something one of a kind.
Installation guidance and video tutorials are available, and qualifying orders ship free. Measure your glass, allow an inch or two of bleed for full coverage, and we will print it and ship it ready to apply.
Putting vinyl decals on car windows comes down to three things: automotive-grade film, a clean and dry surface, and a patient squeegee pass. Get those right and the decal will sit flat through summer heat, winter cold, and every car wash in between. Let's Print Big uses top-rated 3M and Oracal substrates and ships products weeded and masked with installation guidance, so the install process is straightforward.
Frequently Asked Questions
Do vinyl decals stick to car windows?
Yes, as long as the glass is clean and dry before application. Automotive-grade adhesive vinyl bonds to glass, and a full cure takes about 24 hours, so avoid washing the window right after installing. Skip craft vinyl, which is not built for sun and rain. A laminated decal adds UV protection and helps it last years outdoors. Press the edges down firmly with a squeegee so moisture and road grit cannot work under the film.
Can you put a decal on a tinted car window?
You can, but placement matters. Apply vinyl decals on tinted windows to the outside of the glass, not over the tint film on the inside. Adhesive bonded to aftermarket tint can pull the film loose when removed. Perforated window graphics like a rear window decal are designed for exterior use and still let you see out through the 50/50 holes. Check that the decal does not cover a sensor or camera before you press it down.
How do you remove stickers from car windows without damaging the glass?
Warm the decal with a hair dryer on low to soften the adhesive, then peel slowly from a top corner at a sharp angle. For leftover residue, dab isopropyl alcohol or a glass cleaner onto a lint-free cloth and work it gently. Never use a razor blade on tinted glass or near defroster lines. Automotive vinyl is made to come off with little to no residue, which makes removal easier than with craft stickers.
Can a vinyl decal block a driver's view?
It can if you place it in the wrong spot. Keep decals off the windshield and the front side windows in most states, since those areas fall under driver visibility rules. Rear window graphics are usually fine, but check your state law and never cover a third brake light. Perforated vinyl lets you see out from the inside while showing the graphic outside, which is why it works for full rear window coverage.
