
Best Surface Prep for Vehicle Vinyl Wraps

Table of Contents
- Why Surface Prep Decides Whether Your Vinyl Wrap Sticks
- How to Prep a Car for Vinyl Wrap: The Full Workflow
- Isopropyl Alcohol for Vinyl Wrap Prep: Mix Ratios and Technique
- Paint Condition for Car Wraps: What You Can and Can't Cover
- Vinyl Wrap Surface Preparation Tools You Actually Need
- When Sanding Is Necessary and How Far to Go
- Temperature, Humidity, and the Final Contamination Check
- Frequently Asked Questions
Last Updated: October 18, 2026
Why Surface Prep Decides Whether Your Vinyl Wrap Sticks
The best surface prep for vehicle vinyl wraps is a clean, smooth, fully cured panel free of wax, grease, and loose material, and it is where most wraps fail before the film touches the paint.
Adhesive bonds to whatever sits on top of the panel.
At Let's Print Big, we ship vehicle graphics weeded and masked, with installation guidance and video tutorials.
How to Prep a Car for Vinyl Wrap: The Full Workflow
Prepping a car for a vinyl wrap is a four-stage job: wash, decontaminate, dry, then final wipe.
Plan on a full day for a truck or muscle car working panel by panel. Rushing the wash is the most common, and most costly, mistake.
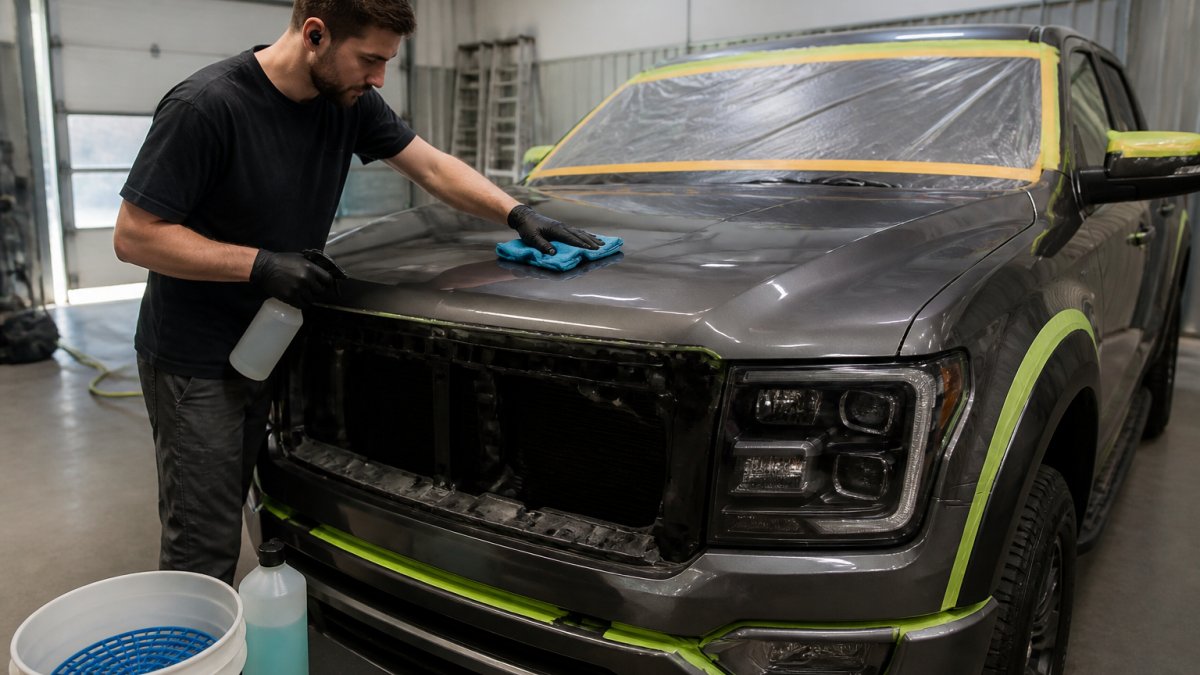
Step 1: Wash With pH-Neutral Shampoo
Start with a pH-neutral car shampoo, not dish soap, which strips wax but leaves residue and can dry out trim.
Use the two-bucket method: one bucket of clean suds, one of rinse water.
Work top down, roof, glass, hood, then lower panels last, where the heaviest road grime sits. Rinse thoroughly and keep the surface wet to prevent water spots.
Step 2: Remove Grease, Wax, and Polish, With the Right Chemistry for Each Substrate
Washing does not remove wax, polish residue, or grease. That needs a dedicated step, and the cleaner must match the substrate, a solvent strong enough for a greasy lower panel can stain plastic trim or soften fresh paint.
- Painted factory panels: A dedicated wax and grease remover (often a blend of petroleum distillates) is the standard choice. Apply with a clean microfiber cloth, one panel at a time, let it flash off, then wipe with a fresh cloth. Do not let it pool on edges or seams.
- Glass: Isopropyl alcohol or a dedicated glass cleaner works, but avoid ammonia-based cleaners near window tint film and around rubber seals, which can dry and crack.
- Plastic and textured trim: Many solvent-based wax and grease removers will dull or stain bare plastic. Use a mild all-purpose cleaner diluted per the label, agitate with a soft brush, and rinse. Test on a hidden spot first.
Pay extra attention to lower panels, edges, seams, and recesses where old product collects, and around trim, badges, and door handles where wax hides. If the paint still feels slick or beads water, repeat the wipe.
Step 3: Wipe Down and Dry
Dry with a clean, lint-free microfiber towel. Do not let the car air dry in the sun, water spots are mineral deposits that sit between the film and the paint.
Blot rather than scrub, which pushes lint and grit back into the surface. Dry seams, panel gaps, and recesses with a heat gun on low or compressed air, then let the panel cool before the final wipe, trapped moisture at an edge is a leading cause of lifting.
Step 4: Final Wipe and a Measurable Contamination Check
The last step is the one most installers rush, and it decides whether the prep holds. Before the film goes down, inspect under a handheld LED work light at a low angle:
- Panel is completely dry, with no water weeping from seams, trim, or panel gaps
- Surface feels smooth under your fingertips with eyes closed
- Water does not bead anywhere on the panel (beading means wax or polish remains)
If any box is unchecked, fix it before the film goes down. A clean panel is not one that looks clean, it is one that passes every check.
Isopropyl Alcohol for Vinyl Wrap Prep: Mix Ratios and Technique
Isopropyl alcohol is the final wipe that removes the last film of oil and residue. Most installers mix it roughly 50/50 with distilled water; start there and only go stronger if the surface still beads. Achieving this level of cleanliness is the foundational step toward quality surface preparation that prevents premature lifting and ensures the long-term durability of the vinyl.
Technique matters more than the ratio:
- Spray onto a clean microfiber cloth, not directly onto the panel, so you control the amount.
- Wipe in one direction, then flip the cloth and wipe back over the same area with a dry section.
- Change cloths often. A dirty cloth just moves oil around.
Paint Condition for Car Wraps: What You Can and Can't Cover
Vinyl hides color, not texture. Paint condition for car wraps comes down to one question: will the film sit flat on this panel, and will the paint stay put underneath it?
Factory paint in good condition is the ideal base. A smooth, fully cured clear coat gives adhesive the best chance to bond and stay bonded. But "factory paint" and "good condition" are two separate tests, and both have to pass.
Paint Cure and Repair History: The Test Most Installers Skip
Fresh paint is not factory paint, and treating it that way is a common cause of wrap failure. Solvents in new paint off-gas for weeks after spraying; trap that gas under vinyl and you get bubbles, lifting, and a mottled finish no re-squeegeeing will fix.
Before wrapping any panel with a repair history, verify three things:
- Cure time. Ask the shop that painted the panel how long it needs before wrapping. Cure timelines vary by product and application method, so get the answer from the shop that sprayed it rather than guessing. A common pattern is that a repainted panel needs substantially longer than a factory panel before it is wrap-ready.
- Adhesion. A repainted panel can look perfect and still have poor adhesion. A simple tape-pull test on an inconspicuous spot, press a strip of tape firmly, then pull, tells you whether the paint is bonded or sitting on top of the surface.
- Repair type. Filler, primer, and blend areas behave differently from original paint. Note where the repair is, and inspect those transitions closely; a wrap that bridges a repair edge can lift along that line.
If you cannot confirm cure time and adhesion, do not wrap the panel. Wait, or get it assessed.
Peeling, Damaged, or Repainted Panels
Peeling paint is a stop sign. If the clear coat is lifting, the vinyl will lift it further and the film will fail along with the paint. Fix it or skip that panel.
Light scratches and swirl marks will telegraph through vinyl. Deep scratches, dents, and rust need repair first.
When to Stop and Get a Professional Assessment
Sanding solves texture, not a failing substrate. Stop and get the panel assessed if you see any of the following:
- Peeling or flaking clear coat across more than a small spot. The film will lift it, and the failure will spread.
- Failing or poorly bonded paint anywhere on the panel, including around repaired areas.
- Rust, surface rust, bubbling paint at a seam, or rust bleeding from a chip. Rust continues under vinyl.
A paint shop or a wrap installer with a paint background can tell you in minutes whether a panel is wrap-ready, cheaper than redoing a failed wrap.
Vinyl Wrap Surface Preparation Tools You Actually Need
You do not need a full detail shop to prep for a wrap. You need the right basics and clean cloths.
| Tool | What It Does | Why It Matters |
|---|---|---|
| pH-neutral car shampoo | Lifts road grime safely | Won't strip or damage paint |
| Two wash buckets with grit guards | Keeps dirt out of the wash mitt | Prevents micro-scratches |
| Wax and grease remover | Dissolves wax, polish, and oil | Adhesive needs a bare surface |
| Isopropyl alcohol plus distilled water | Final residue wipe | Removes the last oil film |
| Microfiber and lint-free cloths | Wipe and dry without scratching | Lint under film is permanent |
| Nitrile gloves | Keeps skin oil off clean panels | Fingerprints cause lifting |
| Plastic razor blades and trim tools | Lift edges and trim safely | Avoids paint damage |
| Heat gun or hair dryer | Dries seams and recesses | Moisture trapped at edges causes failure |
Skip the orbital sander unless you have read the next section.
When Sanding Is Necessary and How Far to Go
Sanding is necessary only when the surface has a texture or defect the vinyl cannot bridge. Most factory paint in good shape needs none.
When it is needed, go light: fine grit, only the affected area, stop as soon as the surface feels smooth.
- Use a fine grit on isolated rough spots.
- Sand by hand on curved panels and edges.
- Wipe all dust off with alcohol before moving on.
If a panel needs heavy sanding or bodywork, that is a paint shop job, not a prep job. Stop and get it assessed.
Temperature, Humidity, and the Final Contamination Check
Temperature and humidity decide whether your prep holds. Work in a garage or shaded area at moderate temperatures, away from direct sun.
Dry seams and recesses with a heat gun on low, then let the panel cool before wiping.
Then run the final check:
- Panel is completely dry, with no water in seams or trim
- Surface feels smooth under your fingertips
- No wax, polish, or grease residue (water does not bead)
If any box is unchecked, fix it before the film goes down. For more on how graphics behave in hot climates, see guidance from the Specialty Equipment Market Association on finish care, and the EPA's consumer information on product safety when handling solvents.
Prep is the part of a wrap job nobody photographs, and it decides whether the film lasts.
At Let's Print Big, we make custom vehicle art and decals with high-resolution graphics, and every order arrives weeded and masked with video tutorials to walk you through installation.
Frequently Asked Questions
How clean does a vehicle surface need to be before wrapping?
Clean enough that a white lint-free cloth wiped across the panel shows no gray or brown residue. Wash with pH-neutral car shampoo using the two-bucket method, then remove wax, polish, and grease with a dedicated panel wipe. Finish with an isopropyl alcohol wipedown and let the surface dry completely. Pay extra attention to lower panels, edges, seams, and recesses where road grime collects. If any cloth comes back dirty, repeat the wipe until it stays white.
Should I use isopropyl alcohol before wrapping my car?
Yes, an isopropyl alcohol wipedown is the standard final step in vinyl wrap surface preparation. Dilute IPA to roughly 50 percent with distilled water, spray it on a small section, and wipe with a clean lint-free microfiber cloth, flipping or replacing the cloth often. IPA flashes off fast and leaves no residue, which is exactly what you want before adhesive contacts the paint. Avoid wiping a hot panel in direct sun, and never use alcohol as a substitute for degreasing a heavily soiled surface.
Do you need to sand a vehicle before applying vinyl wrap?
Usually not. Factory paint in good condition needs cleaning and degreasing, not sanding. Sanding is reserved for rough texture, scratches you can feel with a fingernail, or areas where old paint is flaking. When sanding is needed, use fine grits around 800 to 1500 and sand only the defect, then clean off all dust. Aggressive sanding removes clear coat and can create a texture that shows through the vinyl. If a panel has deep damage or failing paint, stop and have a body shop assess it first.
Can you wrap a vehicle with damaged or peeling paint?
Peeling paint is a poor base for any vinyl wrap. Adhesive bonds to whatever is underneath, so if the paint is lifting, the wrap will lift with it. Small chips can be cleaned and sealed, but large areas of peeling, bubbling, or poorly bonded repaint need repair before wrapping. Fresh repaints also need to cure fully, often several weeks depending on the shop and product, before vinyl goes on. Check paint condition for car wraps panel by panel and get a professional opinion on anything questionable.