
DIY Cornhole Board Wrap Installation Guide for 2026

Table of Contents
- What You'll Need: Cornhole Board Wrap Installation Tools
- Step 1: Surface Preparation and Cleaning
- Step 2: Aligning and Positioning Your Cornhole Board Wrap
- Step 3: Peeling, Applying, and Trimming the Vinyl
- How to Prevent Bubbles in Vinyl Wraps
- The Best Clear Coat for Cornhole Boards
- Curing, Maintenance, and Environmental Factors
- Conclusion: Your Boards, Your Rules
- Frequently Asked Questions
Last Updated: September 28, 2026
What You'll Need: Cornhole Board Wrap Installation Tools
A clean, professional-looking diy cornhole board wrap installation guide starts with the right tools on your bench. At Let's Print Big, we've watched thousands of customers install our wraps, and the ones who gather everything first always get the smoothest finish.

Here's what to have ready:
- Squeegee with a felt edge for pressing vinyl flat
- Utility knife or X-acto blade for trimming
- Masking tape for the hinge method
- Tack cloth to lift dust before you apply
- Sanding block with 220-grit paper for rough spots
- Spray bottle with water and a drop of dish soap
- Heat gun or hair dryer for edge sealing
- Clean lint-free cloths for wiping
You supply the boards. Our wraps come weeded and masked, so the prep work is already done for you.
Step 1: Surface Preparation and Cleaning
Surface preparation is the step most people rush, and it's the one that decides whether your wrap lasts years or peels in months. A smooth, dust-free board face gives the adhesive something to grip.
Start by sanding the board face with 220-grit paper. Focus on any divots, knots, or rough patches. Wipe away dust with a tack cloth, not a damp rag.
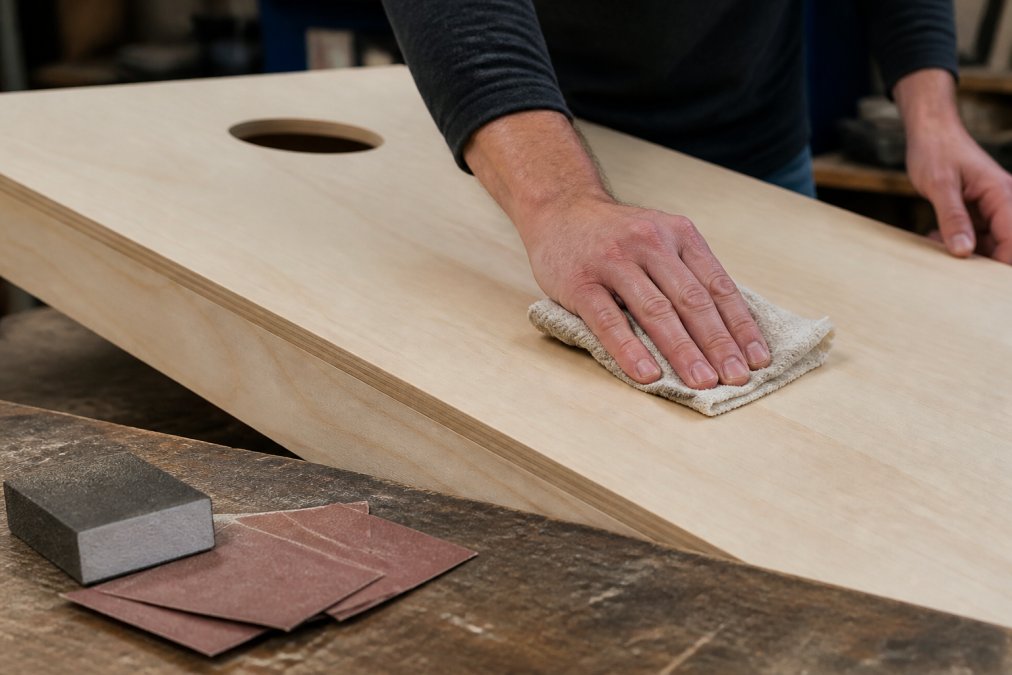
If your board is raw wood, seal it first. A moisture barrier keeps humidity from pushing the vinyl up later. Let any sealer dry fully before moving on.
Then wipe the surface one more time. You want it clean enough that a piece of tape sticks firmly and pulls off clean.
Step 2: Aligning and Positioning Your Cornhole Board Wrap
Alignment is everything with a cornhole board wrap. Once the adhesive touches wood, you have seconds to adjust before it grabs.
Use the hinge method to lock in your position:
- Lay the wrap on the board and check the margins.
- Tape the top edge down with masking tape.
- Lift the bottom half and peel back the adhesive backing.
- Press the exposed half down with your squeegee.
- Remove the tape, peel the top half, and repeat.
This keeps the graphic centered and stops the wrap from sliding. Our wraps print at 24.5 inches wide by 48.5 inches high to cover regulation boards with minor trimming.
You've got wiggle room. Work slowly from the center outward.
Step 3: Peeling, Applying, and Trimming the Vinyl
Peeling and applying the vinyl is where patience pays off. Go slow, and press as you go.
Peel only a few inches of adhesive backing at a time. Press that strip down with your squeegee using firm, overlapping strokes. Then peel a little more.
For curved or stubborn spots, warm the vinyl with a heat gun or hair dryer.
How to Prevent Bubbles in Vinyl Wraps
Bubbles in vinyl wraps come from trapped air, dust, or a rushed squeegee stroke. The good news: our air egress vinyl is built to let air escape as you press.
Custom Name and Date on Wood Cornhole →
Here's how to keep the surface flat:
- Work from the center out. Push air toward the edges.
- Use the wet method for large wraps. A light spray of soapy water lets you reposition and squeegee out fluid.
- Overlap your squeegee strokes by half each pass.
- Prick stubborn bubbles with a pin, then press flat.
- Warm the vinyl so it relaxes and releases trapped air.
The Best Clear Coat for Cornhole Boards
The best clear coat for cornhole boards is a gloss polyurethane, but the type you pick matters as much as the brand. Water-based and oil-based formulas behave differently on vinyl, dry on different schedules, and age differently under sun. Most competitors skip this distinction, so here is the practical breakdown.
Water-based polyurethane
- Dries to the touch in about 1 hour and can be recoated in 2-4 hours.
- Low odor, so it works in a garage or basement without heavy ventilation.
- Dries clear and stays clear; it will not amber over time.
- Thinner film build, so you typically need 3-4 coats for real scratch protection.
- Cleans up with soap and water.
Oil-based polyurethane
- Dries to the touch in 4-6 hours and needs 12-24 hours between coats.
- Strong solvent smell; only use it outdoors or with a respirator and open airflow.
- Adds a warm amber tone that deepens over the years, great on natural wood, less ideal if your wrap art has cool blues or whites you want to keep neutral.
- Thicker film per coat, so 2-3 coats usually match 3-4 water-based coats.
- Requires mineral spirits for cleanup.
How this interacts with your wrap
- Laminated wraps already carry a UV and scratch layer. Adding polyurethane is optional and mainly changes sheen, not durability. You can play the same day.
- Non-laminated wraps need a top coat. Water-based is the safer default on vinyl because the solvent load in oil-based formulas can soften some adhesives if you flood the first coat. Apply thin, let it flash, then build.
- Whichever you choose, test on a trimmed scrap of the wrap first. Some inks shift slightly under oil-based amber tones.
Application that actually lasts
- Wipe the wrapped surface with a tack cloth to remove any dust from trimming.
- Stir the can, do not shake it, or you trap bubbles you will brush into the film.
- Load a foam brush lightly and lay a thin coat with the grain of your squeegee strokes, not against them.
- Let each coat dry fully before the next. Rushing traps solvent and clouds the finish.
- Lightly scuff with 320-grit between coats only if you see dust nibs.
- Final cure takes about 7 days for water-based and up to 30 days for oil-based before the film reaches full hardness.
Curing, Maintenance, and Environmental Factors
Curing time and climate decide how long your wrap looks new, and this is the part most guides gloss over. Here is what actually happens under the vinyl and how to work with it.
How the adhesive cures
- Initial tack: immediate, but repositionable for only seconds.
- Working bond: 24 hours at 65-80°F.
- Full cure: 72 hours at ideal conditions, up to 7 days in cool or damp air.
Temperature and humidity ranges that work
- Apply between 65°F and 80°F surface temperature. Below 60°F the adhesive gets stiff and will not wet out; above 90°F it grabs too fast to reposition.
- Keep relative humidity between 40% and 60%. Above 70% and moisture can wick under an edge before the bond sets. Below 30% and static pulls dust onto the surface.
- Let the boards acclimate indoors for at least 4 hours before applying if they were stored in a hot truck or cold garage.
Why UV and moisture break wraps down
Seasonal maintenance schedule
- After every session: wipe with a soft cloth and mild soapy water. Skip solvents, ammonia, and abrasive pads, they break down the laminate or top coat.
- Monthly during play season: check all four edges and the hole rim. Press any lifted corner down with a warm cloth for 30 seconds.
- Before storage: clean, dry fully, and store flat indoors. Stacking boards face-to-face traps moisture.
- Annually: reapply a thin coat of polyurethane on non-laminated wraps to restore UV protection.
Conclusion: Your Boards, Your Rules
A custom wrap turns a plain set of boards into something people ask about at every cookout. The install takes an afternoon, and the payoff lasts for seasons.
Frequently Asked Questions
How do you apply a cornhole board wrap without bubbles?
Start with a dust-free surface and use the hinge method: tape the wrap in place, peel back half the adhesive backing, and press down with a squeegee using firm, overlapping strokes. The air egress vinyl from Let's Print Big releases trapped air as you work, which makes bubble-free results much easier to achieve. If a bubble appears, lift the nearest edge and re-squeegee that section.
Do you need to clear coat cornhole boards after applying wraps?
It depends on the finish you choose. The laminated version from Let's Print Big already includes a protective layer that guards against scratches and UV rays, so you can play right away without a top coat. If you order the non-laminated version, apply a polyurethane clear coat to seal and protect the graphic. A poly coating can go over either version but is not necessary on the laminated one.
How do you cut the hole out of a cornhole wrap?
The hole is not pre-cut, so you cut it after the wrap is fully applied for exact placement. Once the vinyl is smoothed and adhered, flip the board over or reach underneath to locate the opening. Use a utility knife or X-acto blade to carefully trace the circle from the back side, cutting through the vinyl only. A steady hand and a fresh blade give you the cleanest edge.
How long should you wait before playing on newly wrapped boards?
If you used the laminated wrap and no top coat, the boards are ready to play once the vinyl is fully adhered and smoothed. For non-laminated wraps with a polyurethane coating, wait 24 to 48 hours for the finish to cure before tossing bags. Humidity and cool temperatures can extend that window, so check that the surface feels hard and dry before game time.