
How Long Do Cornhole Board Decals Last Outdoors?

Quick Summary
Cornhole board decals last as long as their material, prep, finish and storage allow, and no single factor decides it. Cast vinyl applied to a clean, dry board and kept out of constant weather can hold its color and adhesion for a long time. A laminated finish adds protection against scratches and moisture.
- Cast vinyl conforms better to curved board edges and holds up longer under flexing.
- Dust, oil or trapped moisture under the wrap is the most common cause of early edge lifting.
- Laminated wraps add a protective layer against scratches and moisture.
- Keep boards covered and stored dry, since open exposure ages them much faster.
- Check for lifting edges, fading, cracks, bubbles or mildew to catch problems early.
Table of Contents
- What Determines How Long Cornhole Board Decals Last
- Laminated vs Non-Laminated Cornhole Wraps
- Best Clear Coat for Cornhole Wraps
- How Sun, Heat, and Moisture Affect Cornhole Decal Lifespan
- Signs Your Cornhole Board Decals Are Degrading
- How to Protect Cornhole Board Decals
- Applying and Repairing Your Wraps for a Longer Life
- Ordering Long-Lasting Wraps for Your Next Set of Boards
- Frequently Asked Questions
What Determines How Long Cornhole Board Decals Last
Cornhole board decal lifespan depends on several variables, not just the product. Material choice, surface preparation, the finish you pick, and how the boards are stored all shape the result. Vinyl is a common choice for board wraps, and a well-applied vinyl wrap kept out of direct, constant weather can hold its color and adhesion for a long time.
The biggest variables are:
- Vinyl quality and print method: Cast vinyl conforms better to the curved edges of a board than thinner calendared material and holds up longer under flexing.
- Surface preparation: Dust, oil, or moisture trapped under the wrap is the most common reason edges lift early.
- Finish: A laminated wrap adds a protective layer against scratches and moisture.
- Exposure: Boards kept covered and stored in a dry spot age far more slowly than boards left in the open.
Lifespan is rarely decided by one factor. A high-quality wrap applied to a dirty board will fail sooner than a mid-grade wrap applied to a clean, dry surface.
Laminated vs Non-Laminated Cornhole Wraps
The main choice you will face is whether to add a laminate layer. Laminated wraps include a gloss laminate layer for added surface protection. Non-laminated wraps are your custom artwork printed on vinyl without the additional laminate layer.
Choosing between laminated and non-laminated depends on how the boards will be used. Our [Design Your Own Cornhole Decal Wrap] lets you select Single Laminated or Single NON Laminated when you order, so you can match the finish to how the boards will be used.
The finish you choose affects how well the wrap holds up, so compare the two options side by side.
| Option | What it is | Key difference |
|---|---|---|
| Laminated wrap | Custom artwork with a gloss laminate layer | Added protection against scratches and moisture |
| Non-laminated wrap | Custom artwork printed on vinyl only | No additional laminate layer |
| Clear coat | Liquid sealant applied after installation | Separate step from factory lamination |
Best Clear Coat for Cornhole Wraps
A clear coat is a separate step from lamination. Lamination is a factory-applied film bonded to the wrap. A clear coat is a liquid sealant you brush or spray on after installation. Both add protection, but the clear coat should be chosen carefully. Use a clear coat labeled for outdoor vinyl or exterior graphics, and confirm it is compatible with the vinyl you are using. Test a small hidden area first, since some solvent-based sealers can soften or cloud certain films.
Apply thin, even coats and allow full curing time before stacking or storing boards. A clear coat will not repair poor installation, and it can trap moisture if the surface was not dry when you sealed it.
How Sun, Heat, and Moisture Affect Cornhole Decal Lifespan
Environmental exposure affects how long a wrap lasts. Sun, heat, and moisture can each wear on a wrap, and keeping boards out of harsh conditions helps preserve the finish.
Practical steps help: keep boards off damp concrete, let them dry completely after rain, and shade or store them indoors during the hottest part of the day and between sessions. For more detail, see preventing vinyl decal peeling in hot climates.
Signs Your Cornhole Board Decals Are Degrading
Catch problems early and you can often repair them before the whole wrap fails. Watch for:
- Lifting or curling edges, especially at the corners of the board
- Fading or chalky color, particularly on the side facing the sun
- Fine cracks in the printed surface
- Bubbles or puckering that does not flatten out
- Dark staining or mildew patches where moisture has collected
How to Protect Cornhole Board Decals
Good habits help extend lifespan. Keep boards out of direct sun when you can, store them in a dry space, avoid stacking them on damp concrete, and wipe the surface with a soft cloth and mild soapy water, then dry it fully. Read about preventing vinyl graphics from fading in sun for more protection steps.
Applying and Repairing Your Wraps for a Longer Life
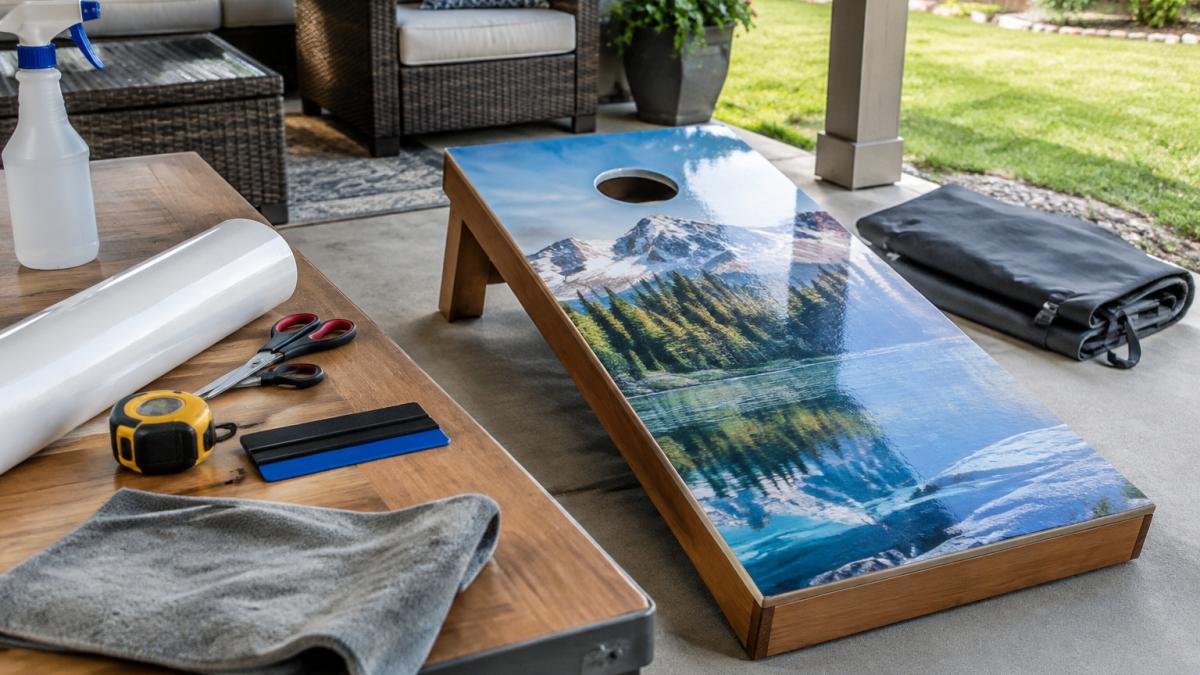
Application quality sets the ceiling on how long a wrap will last, and most early failures trace back to the install rather than the material. Start with a board that is clean, dry, and free of oil. Learn more about surface prep for vehicle vinyl wraps. Wipe the surface with a degreasing solvent, let it flash off, and confirm there is no residue before the film touches it. Work in moderate temperatures, since vinyl stretches and sticks poorly when cold and can overstretch when hot. Position the wrap, tack one edge, then smooth from the center outward with a squeegee to push air toward the edges. Heat-set the curved edges gently with a heat gun so the film conforms without overstressing it.
Repair is where many owners give up too early, and most common problems can be fixed without replacing the whole wrap. A lifted corner or edge is the easiest case. Lift the edge gently, clean the exposed adhesive and the board beneath with isopropyl alcohol, and let it dry completely. Warm the vinyl with a hair dryer until it is pliable, then press it back down from the center toward the edge and roll it firmly with a small roller or the back of a plastic scraper. Use a little extra heat on curved areas and avoid overheating, which can blister the print.
Bubbles and puckering that appear after installation usually come from trapped air or uneven tension. For a small bubble, prick it at the outer edge with a fine pin, press the air out toward the pinhole, and re-smooth the area. Do not puncture the center of a large bubble, because the hole will show and the film will not reseal cleanly. For a larger lifted section, work the film back into position and re-bond it in layers rather than all at once.
Larger damage calls for a patch. Cut a piece of matching vinyl slightly larger than the damaged area, align the pattern carefully, and tape the patch in place before cutting through both layers with a sharp blade. Peel away the cut-out scrap and the patch, clean the bonding surface, and apply the new piece with the same squeegee technique. Feather the edges with gentle heat so the seam blends into the surrounding wrap.
Removal is the step most guides skip, and it matters when a wrap is beyond repair. Warm the vinyl with a heat gun on low, then lift a corner with a plastic scraper and peel slowly at a low angle, keeping heat on the adhesive as you go. Old adhesive left on the wood can be softened with a citrus-based adhesive remover or mineral spirits, applied sparingly and wiped off before it soaks into the grain. Watch out: sanding aggressively or using a metal scraper on the surface will gouge the wood and telegraph through a new wrap, so use only plastic tools and finish with a light scuff and a thorough cleaning before the new wrap goes on.
Ordering Long-Lasting Wraps for Your Next Set of Boards
When you order, decide on the finish first, then the level of customization you need. If you are designing your own wrap, our [Design Your Own Cornhole Decal Wrap] lets you choose Single Laminated or Single NON Laminated before you place the order. If you would rather have help bringing an idea to life, our [Custom Cornhole Wraps with up to 3 revisions] include design services and proof approval before printing.
Every wrap is designed for standard 24 inches by 48 inches boards and printed slightly larger for trimming. Matching the finish to how and where you will use the boards is the simplest way to get the most years out of them.
Frequently Asked Questions
How long do cornhole board decals last outdoors?
Cornhole board decal lifespan outdoors depends on the vinyl quality, whether they are laminated, and how much sun and moisture they face. Boards kept under a covered patio or stored indoors between games can last noticeably longer, while boards left in full sun and rain often start to fade, lift at the edges, or crack within a season or two.
Does lamination extend the life of cornhole board decals?
Yes. A laminate layer adds a clear protective film over the printed vinyl. Let's Print Big offers both Single Laminated and Single NON Laminated options, so you can choose based on how often your boards will be used outdoors.
Can you apply a clear coat over cornhole board decals?
You can apply a clear coat over a finished wrap, but the clear coat must be compatible with vinyl. Look for a UV-resistant, outdoor-rated clear sealer and test it on a small offcut first, since some sprays can soften or cloud the vinyl. Lamination is generally simpler and more reliable than adding a DIY clear coat, so ordering a laminated wrap is usually the easiest way to get surface protection.
What is the best way to protect cornhole decals from wear and tear?
Store boards indoors or under cover when not in use, keep them out of direct midday sun when possible, and wipe them down gently. Avoid dragging boards across rough surfaces and keep them dry during storage to prevent moisture from lifting the edges.
