
How to Apply Cornhole Decals Without Wrinkles

Quick Summary
To apply cornhole decals without wrinkles, prep a clean, dry, smooth board, then tape the top edge as a hinge and peel the backing slowly, a few inches at a time. Squeegee from the center outward with firm, even pressure. Catch wrinkles early, before the adhesive sets.
- Wrinkles and bubbles usually come from a dirty or uneven board, vinyl pulled too tight, or trapped air.
- Wipe the board with a damp cloth, let it dry fully, then sand rough spots.
- Never peel the backing off all at once, since that pulls the vinyl taut.
- Use a soft felt-edged squeegee and work from the center toward the edges.
- Follow the manufacturer's wet or dry instructions, which override general rules.
Table of Contents
- Why Cornhole Decals Wrinkle and What Prevents It
- Preparing the Cornhole Board Surface Before You Apply
- Wet vs. Dry Vinyl Decal Application: Which to Choose
- Tools for Applying Vinyl Decals to Cornhole Boards
- How to Apply Vinyl Decals Without Bubbles, Step by Step
- Fixing Wrinkles and Bubbles After They Form
- How Long to Let Cornhole Decals Cure Before Play
- Booking Your Cornhole Wrap or Ordering Your Decal Kit
- Frequently Asked Questions
Why Cornhole Decals Wrinkle and What Prevents It
Last Updated: November 12, 2026
Wrinkles and bubbles usually come from three things: a dirty or uneven board, vinyl pulled too tight, and air trapped under the film. Cornhole decals are weeded and masked, so the hard part is handled before the vinyl reaches your garage. The rest depends on how you apply it. Know these three causes, and the cornhole decals should lie flat with careful application.
Most wrinkles start when the vinyl is stretched while it goes down. Pull too hard along one edge, and the film bunches up as it meets the wood. Bubbles form when air gets trapped under the middle of the decal and nowhere to escape.
Watch out: a wrinkle that sets while the adhesive is still fresh is much harder to fix than one caught early, so stop and reposition the moment you see it forming.
Preparing the Cornhole Board Surface Before You Apply
Clean, dry, smooth wood is the foundation of a clean application. Dust, oil, and loose paint lift the adhesive edge and trap air. Wipe the board with a damp cloth, let it dry completely, then sand any rough spots with fine sandpaper. Remove every speck of sawdust before you start.
Check the surface by running your hand over it. Any bump or raised grain will show through the vinyl as a bubble, so smooth it out now.
- Wipe the board with a clean, damp cloth
- Let it dry fully, ideally for several hours
- Sand rough or raised spots with fine-grit paper
- Vacuum or brush off all sanding dust
Wet vs. Dry Vinyl Decal Application: Which to Choose
Wet and dry application are not interchangeable. To compare how professional-grade wraps handle under each method, see professional-grade wrap comparisons. The method has to match the vinyl, the adhesive, and what the manufacturer says about the specific product in your hands. Get that match wrong and you either fight wrinkles the whole way down or you trap water under a film that was never meant to see it.
Start with the manufacturer's instructions. If the product data sheet says dry application only, use dry application. Some adhesive-backed vinyls, especially certain printable films and anything with a repositionable or low-tack adhesive, are formulated to be installed dry, and misting the board can weaken the bond or leave a haze under the film. If the instructions allow or recommend wet application, you have a choice to make.
What actually pushes you toward wet application:
- Large, full-board wraps. Anything that covers most of a 24-by-48-inch board face is hard to place dry in one shot. A soapy-water slip layer buys you seconds of slide time to center the graphic around the hole and the edges.
- Thin, conformable vinyl. Thinner films stretch and crease easily under dry pressure. The slip layer lets the squeegee move without dragging the film.
- Beginner installers and one-off jobs. Wet application is more forgiving of a slightly off-center first touch.
- Warm work areas. In a hot garage, dry adhesive can grab almost instantly. A wet surface extends your working window.
What pushes you toward dry application:
- Small decals and tight spots. A logo or number smaller than roughly a foot across is easier to place dry, and you avoid waiting for water to evaporate from under the edges.
- Vinyl with a strong, aggressive adhesive. These films are designed to bite on contact; a slip layer can make them skate and pick up grit.
- Products whose instructions specify dry. Follow them.
- Humid or cool conditions where trapped moisture will not flash off quickly. Water that stays under the film can cloud the print or soften the adhesive over time.
The transfer tape question. If your decal arrives weeded and masked with transfer tape, the tape is what holds the graphic together while you position it. With wet application, some transfer tapes release cleanly after the water is squeegeed out and the film has had a few minutes to tack; others lift the vinyl with them if you pull too soon. Once the tape releases cleanly, the same patient, even pressure helps keep vinyl smooth around a curve, where The Wits End can be a useful next stop.
A practical rule of thumb. Small graphic, dry board, dry method. Large wrap, clean board, light soapy mist, wet method, squeegee from the center out. When the instructions disagree with the rule of thumb, the instructions win.
Tools for Applying Vinyl Decals to Cornhole Boards
You do not need many tools, but the right ones make a real difference:
- Squeegee with a soft felt edge to push out air without scratching the print
- Measuring tape to center the decal around the hole and board edges
- Masking tape to hold the decal in place as a hinge
- Heat gun or hair dryer on low to soften vinyl around curves
- Spray bottle with soapy water for the wet method
- Craft knife to trim excess vinyl at the edges
How to Apply Vinyl Decals Without Bubbles, Step by Step
Start by laying the decal face-up on a clean floor and aligning it to the board. For a fuller walkthrough of the whole installation process, see DIY cornhole board wrap installation steps. Tape the top edge with masking tape so the decal acts as a hinge.
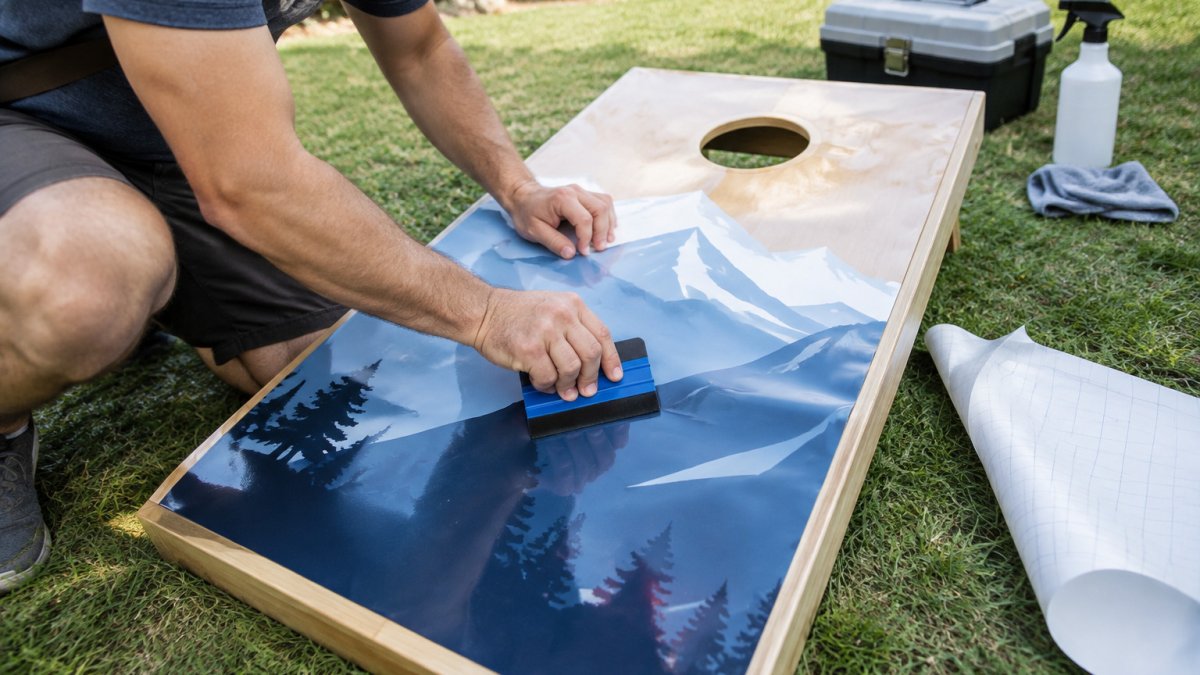
- Flip the decal over the tape hinge onto the board, backing paper still on.
- Peel the backing paper back slowly, a few inches at a time, while you hold the vinyl away from the board.
- Lay the exposed section down, then squeegee from the center outward toward the edges.
- Keep the squeegee at a steady angle and use firm, even pressure.
- Repeat until the full decal is down, then smooth the edges and corners.
- Trim any overhanging vinyl with a craft knife.
Watch out: do not peel the backing off all at once. Doing so pulls the vinyl taut and creates the very wrinkles you are trying to avoid.
The steps below summarise the application process so you can follow the key actions and watch-outs at a glance.
| Step | What to do | Watch out |
|---|---|---|
| Align and hinge | Tape the top edge with masking tape | Decal acts as a hinge |
| Flip and peel | Flip decal over hinge, peel backing slowly | Do not peel all at once |
| Lay and squeegee | Lay exposed section, squeegee center outward | Keep steady angle, firm pressure |
| Finish edges | Smooth edges and corners | Repeat until fully down |
| Trim | Cut overhanging vinyl with craft knife | Use a craft knife |
Fixing Wrinkles and Bubbles After They Form
A bubble and a wrinkle are different problems and need different fixes. A bubble is trapped air under a flat section of film. A wrinkle is folded or stretched vinyl that has already bonded to itself or to the board. Treating a crease like a bubble, pressing it flat, usually makes it worse by trapping the fold under pressure.
Work in this order: catch it early, identify it, then choose the least invasive fix.
1. Bubbles (air only, film still flat).
- Push the air toward the nearest edge with a felt-edged squeegee, working from the center of the bubble outward in short strokes.
- If the bubble sits in the middle of the decal, a single pinhole at its edge with a sharp pin lets the air escape; press the film flat over the hole with your thumb, then squeegee.
- Small pinholes in a printed graphic are usually invisible at normal viewing distance, but keep them at the edge of the bubble, not in the middle of a face or logo.
2. Soft creases (film lifted, no hard fold).
- Warm the area with a hair dryer on low, held several inches away and kept moving. Vinyl softens and relaxes as it warms; overheating it will distort the print or stretch the film permanently.
- Lift the edge of the decal back to the crease, let the vinyl relax for a few seconds, and lay it back down while squeegeeing from the crease outward.
- On a wet application, a soft crease often lifts out because the slip layer is still active. On a dry application, you may need to lift a larger section to give the film room to flatten.
3. Hard creases (a visible fold line).
- A fold that has creased the vinyl itself usually leaves a visible line even after you flatten it. Lift the section, warm it gently, and re-lay it, but expect a faint mark where the fold was.
- If the crease crosses a printed area, the line may show in the graphic. That is a cosmetic limit of the material, not an application error you can fully reverse.
When a wrinkle cannot be repaired. If the vinyl has stretched, the crease has bonded to itself, or the fold sits in a high-visibility part of the design, the clean fix is to replace that section or the decal. Lifting and re-laying a badly stretched film tends to spread the distortion rather than remove it. On a full-board wrap, replacing one panel is often faster and cleaner than chasing a crease.
What not to do. Do not stab a crease with a pin, you will perforate the fold and leave a hole that collects dirt. Do not use high heat to force a crease flat; heat shrinks and distorts vinyl. Do not press a crease with a hard squeegee edge; you will burnish the fold into the adhesive.
Watch out: the longer a wrinkle sits, the more the adhesive sets around it. A crease you catch in the first minute is often fixable; the same crease an hour later usually is not.
How Long to Let Cornhole Decals Cure Before Play
Vinyl needs time to bond. Check the product instructions for the recommended curing time before you play. To learn how long decals hold up once outdoors, read outdoor decal lifespan details.
Booking Your Cornhole Wrap or Ordering Your Decal Kit
Pricing depends on the size of the board, the design, and the quantity you order, so check the current cost on the Let's Print Big website. If you want a ready-made design, you can order a cornhole wrap or decal kit. You can also explore custom design options beyond stock designs before you order. Products arrive weeded and masked, and video tutorials walk you through the steps.
Frequently Asked Questions
Is it better to apply cornhole decals wet or dry?
Wet and dry application each have trade-offs. Wet application uses a light mist of soapy water so you can slide the decal into position, but it needs more time and can leave water trapped under the vinyl if the board is not dried properly afterward. Dry application lets you align the decal and anchor one edge with masking tape before squeegeeing outward. Either way, the surface must be clean and fully dry before the vinyl touches it.
How do I remove wrinkles from a cornhole decal after it is applied?
Lift the vinyl gently at the wrinkle and pull it back toward the nearest anchored edge at a shallow angle. Do not pull hard or the adhesive can tear the vinyl. Once the section is lifted, smooth it back down with a squeegee, working outward from the center.
Can I use Windex to apply vinyl decals?
Let the board dry completely before the decal goes on, and rinse off any soap residue if you used the wet method.
How long should a cornhole decal sit before the board is used?
Let the decal sit undisturbed until the adhesive has fully set before tossing bags onto the board. Check the product instructions for the recommended curing time. Order your decal kit from Let's Print Big for current pricing and shipping details.
