
How to Remove Old Cornhole Board Decals Without Damage

Last Updated: November 12, 2026
Quick Summary
To remove old cornhole board decals without damage, soften the adhesive with gentle heat from a heat gun or hair dryer, then peel slowly from a corner with a plastic scraper held at a low angle. Lift leftover residue with a warm damp microfiber cloth or citrus-based remover, and always spot-test any solvent on a hidden area first.
- Identify whether the decal is vinyl wrap, printed decal, or backing paper before choosing a removal method.
- Work in short pulls of about an inch, keeping the peeled section close to the board.
- Hold a heat gun a few inches away and keep it moving to avoid bubbling clear coat.
- Test removers on the underside edge and wait a full 24 hours before trusting the result.
- Avoid acetone and lacquer thinner on polyurethane or clear coat because both can dull or dissolve it.
Table of Contents
- Identify Your Decal and Board Finish Before You Start
- Lift the Decal Edge and Peel Without Tearing the Board Surface
- Use a Heat Gun for Decal Removal on Stubborn Vinyl
- Scrape With a Plastic Scraper or Razor Blade Without Gouging Wood
- How to Remove Vinyl Adhesive Residue From the Board Surface
- Find the Best Adhesive Remover for Vinyl Decals and Spot-Test It First
- Prepare Cornhole Boards for New Decals After Removal
- Order a Replacement Decal Set That Fits Your Finished Board
- Frequently Asked Questions
Identify Your Decal and Board Finish Before You Start
Learning how to remove old cornhole board decals starts with identifying which cornhole board decals you're peeling off and what's underneath. Most removal mistakes happen before anyone picks up a tool: people grab a razor blade or strong solvent, then find the decal was paper-backed or the board had a fresh clear coat.
Removal mistakes often happen when this step is skipped. Below is a removal-first process that works on sealed boards and finished wood.
Vinyl Wrap vs. Printed Decal vs. Backing Paper
- Vinyl wrap: A thick, stretchy film with adhesive on the back. It usually peels in one piece and leaves gummy residue.
- Printed decal: A thinner printed film, often with paper or plastic backing. It can crack and flake off.
- Backing paper: The liner from an old install, sometimes stuck to the board by mistake. It soaks up moisture and tears easily.
A common mistake is treating a brittle printed decal like a stretchy vinyl wrap. It will shred instead of peel.
Reading the Surface: Polyurethane, Clear Coat, and Bare Wood
Check the board finish before you touch the decal. Polyurethane and clear coat generally tolerate gentle heat and mild solvents; bare, unfinished wood generally does not.
- Shiny, smooth surface: Likely polyurethane or clear coat. Go slow with heat.
- Dull, porous surface: Bare or lightly sealed wood. Skip strong solvents.
- Sticky or soft spots: Old finish breaking down. Test in a hidden corner first.
If you're weighing whether removal is even worth it, our comparison of cornhole board wraps vs painting covers how each finish holds up over time.
Lift the Decal Edge and Peel Without Tearing the Board Surface
Start at a corner, not the middle. Slide a plastic scraper or your fingernail under one edge at a shallow angle.
If the edge won't budge, don't force it. Move to heat. Forcing a cold decal is how boards get gouged.
Worried about the long-term wear on your board? Our guide on whether vinyl decals are easy to remove later answers that question directly.
Use a Heat Gun for Decal Removal on Stubborn Vinyl
A heat gun for decal removal softens the adhesive so stubborn vinyl lets go without a fight. Hold the nozzle a few inches away, keep it moving, heat a small section for a few seconds, then test the edge with your scraper.
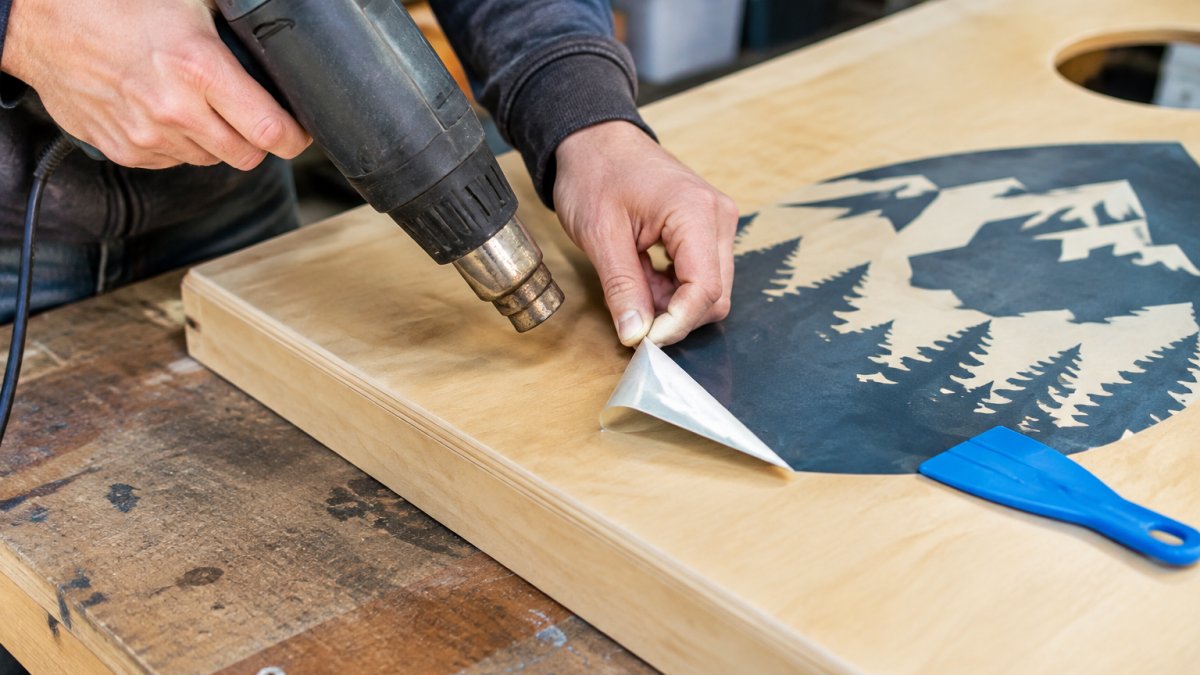
Too much heat in one spot can bubble the clear coat or scorch bare wood. Keep the gun moving and never park it in place.
Heat Gun vs. Hair Dryer: Which Softens Adhesive Better
A heat gun wins on speed and stubborn vinyl. A hair dryer is safer for beginners and thin finishes because it heats slower, so there's less scorch risk. Use the hair dryer on high for small boards or delicate clear coats, and reach for the heat gun when the decal is thick and sun-baked. Either way, keep the tool moving and test as you go.
Scrape With a Plastic Scraper or Razor Blade Without Gouging Wood
A plastic scraper handles most of the job. Hold it at a low angle and push with steady pressure, not force. For tight spots, a razor blade works, but keep it nearly flat against the surface.
- Soften the adhesive with heat.
- Slide the plastic scraper under the edge.
- Work in small sections, front to back.
- Switch to a razor blade only for thin leftover film.
Watch out: dragging a razor across a finished board scores the clear coat. Keep the blade flat and let the edge do the work.
How to Remove Vinyl Adhesive Residue From the Board Surface
Leftover adhesive is the real test. Once the decal is off, you'll see a sticky film where it sat.
Start with a warm, damp microfiber cloth pressed over the residue for a minute to loosen the glue, then wipe in one direction.
Avoid scrubbing hard in circles, that pushes residue into the grain and dulls the finish. Swap cloths often so you're not smearing glue around.
Find the Best Adhesive Remover for Vinyl Decals and Spot-Test It First
The best adhesive remover for vinyl decals is the mildest one that still lifts the glue without changing the board finish. That depends on what is under the decal, not on which bottle has the strongest label.
Work from mild to strong: heat and a dry cloth, then warm soapy water, then a citrus-based remover, and only then a solvent. Each step up the ladder carries more risk to polyurethane, paint, and clear coat.
Match the Remover to the Finish
- Polyurethane or clear coat: Start with warm soapy water and a microfiber cloth. If residue remains, use a citrus-based remover on the cloth, not the board. Avoid acetone and lacquer thinner entirely; both can dull or dissolve a cured clear coat.
- Painted board (latex or enamel over primer): Citrus-based remover is usually safe on cured enamel but can soften fresh latex. Test on the underside edge and wait a full 24 hours before trusting the result, because some paint softens slowly.
- Bare or lightly sealed wood: Skip solvents. Warm water, a plastic scraper, and light sanding remove residue without driving chemicals into the grain, where they can stain or interfere with the next finish.
Citrus-based removers handle most cured vinyl adhesive on sealed boards, while acetone is reserved for bare wood or adhesive cured into a hard film. Rubbing alcohol sits in the middle: useful on light residue, but it can dry out bare wood and leave a hazy patch on some clear coats.
Run a Real Spot Test
A spot test is only useful if it mimics the real job. Do this on the underside edge or the back of the board, where a mistake will not show:
- Clean the test area with a damp cloth and let it dry.
- Apply a small amount of remover to a white cloth, not directly to the board.
- Hold the cloth against the surface for 60 seconds, then wipe in one direction.
- Wait 10 minutes and check for dulling, cloudiness, color shift, or a tacky feel.
- Wait 24 hours and check again. Some finishes soften slowly and look fine immediately after wiping.
If the finish looks unchanged after 24 hours, proceed on a small hidden section of the decal area before committing to the whole board. If it dulls, clouds, or feels tacky, stop and drop back to a milder method.
Watch out: testing on the top face of the board and wiping immediately tells you almost nothing, because the damage from a too-strong solvent often appears hours later.
Solvent Compatibility at a Glance
| Remover | Strength | Best For | Risk to Finish |
|---|---|---|---|
| Warm soapy water | Very mild | Fresh residue, dust, light glue | None on cured finishes |
| Citrus-based remover | Mild | Cured vinyl adhesive on sealed boards | Can leave an oily film that needs a water rinse |
| Rubbing alcohol (70%) | Medium | Light residue, final wipe-down | Dries bare wood; can haze some clear coats |
| Acetone | Strong | Bare wood, hard cured adhesive | Dulls polyurethane and clear coat; flammable |
| Lacquer thinner | Strongest | Bare wood only, as a last resort | Attacks most paints and clear coats; strong fumes |
Ventilate the work area, keep solvents away from open flames and pilot lights, and wear nitrile gloves. Acetone and lacquer thinner are flammable, so work outside or with a door and window open. Store soaked rags in a sealed metal container, not a trash can, because they can self-heat. Careful handling of flammable solvents matters just as much when removing vehicle decals, and Mega Sticker Store offers another context for applying the same paint-safe precautions.
Prepare Cornhole Boards for New Decals After Removal
Removing the decal is half the job. The other half is making the surface flat, clean, and sealed so the next wrap or paint job does not show every scrape and lifted edge underneath. A new vinyl wrap is thin enough to telegraph gouges, raised grain, and ridges of old adhesive, so prep decides the final look.
Inspect and Repair the Surface
Before sanding, look at the board under raking light from a lamp held at a low angle. That light shows dents, lifted clear coat, and residue ridges that look invisible under normal light.
- Lifted or flaking clear coat: Sand the edges feather-smooth with 220-grit, then 320-grit, so the transition to intact finish is gradual. A hard edge under a new wrap will show as a line.
- Gouges from a scraper or razor: Fill shallow gouges with a sanding sealer or a two-part wood filler, let it cure, then block-sand flush. Deep gouges that cross the plywood face may need a spot of epoxy before sanding.
- Sticky residue patches: Re-treat with the mildest remover that worked, then wipe with a water-dampened cloth to remove residue from the remover itself. Solvent residue left on the board can prevent new adhesive from bonding.
Sand in Steps, Not in Circles
- Start with 220-grit on residue ridges and lifted finish edges.
- Move to 320-grit over the whole decal area to blend the surface.
- Finish with 400-grit if the board will receive a new vinyl wrap, because a slightly toothy surface gives adhesive more grip than a polished one.
- Wipe with a microfiber cloth between grits so coarse grit does not contaminate the finer pass.
Watch out: sanding across the grain leaves scratches that show through a thin wrap, and sanding through a veneer face can expose the core, which will not take finish evenly.
Seal and Level Before the New Wrap
If removal exposed bare wood or you sanded through the clear coat, reseal those areas before installing anything. A wipe-on polyurethane or sanding sealer works for spot repairs; let it cure per the label, then scuff with 320-grit and wipe clean.
After sealing, check flatness with a straightedge across the board. Any visible gap is a low spot that will show as a bubble or shadow under a new wrap. Fill and re-sand until the straightedge sits flush.
Final Clean and Dry
- Wipe the entire board with a damp microfiber cloth to lift sanding dust.
- Wipe again with a dry microfiber cloth.
- Let the board dry at least an hour in a dry, dust-free space; longer if you used water-based cleaners.
For the full install process, our DIY cornhole board wrap installation guide walks through alignment, squeegee work, and pressing down edges for a clean, bubble-free finish.
Order a Replacement Decal Set That Fits Your Finished Board
Once the surface is clean and smooth, a replacement decal set brings the board right back to life. Measure your board first so the new wrap fits edge to edge.
Look for these features in a replacement set:
- High-resolution print quality that won't blur up close
- Durable vinyl that holds up to sun and backyard play
- Easy-to-follow install support, including video tutorials
Before you buy, see how different sets stack up in our professional-grade cornhole wraps review. And if you want something beyond stock designs, our guide to custom cornhole board wraps and alternatives shows how to make your board one of a kind.
At Let's Print Big, our cornhole wraps arrive weeded and masked for easy installation, with expert guidance and video tutorials to back you up.
Removing old decals doesn't have to mean damaging your boards.
Frequently Asked Questions
What dissolves vinyl adhesive left on a cornhole board?
Most vinyl adhesive softens with a solvent-based adhesive remover, acetone, or a citrus-based cleaner. Apply a small amount to a microfiber cloth, let it sit for a minute, then wipe with light pressure. Always spot-test on a hidden area first, because strong solvents can dull polyurethane or clear coat. Work in a ventilated space and keep solvents away from open flame.
Can you use a heat gun to remove vinyl from a cornhole board?
Yes, a heat gun for decal removal works well when you keep it moving and hold it several inches from the surface. Warm the vinyl until it turns flexible, then lift an edge with a plastic scraper. Too much heat can scorch finished wood or bubble polyurethane, so test on a corner first and never leave the gun pointed at one spot.
How do you remove old decals from cornhole boards without damaging the finish?
Start by identifying whether the board is sealed with polyurethane or clear coat, then lift an edge with a plastic scraper rather than a razor. Apply gentle heat to soften the adhesive, peel slowly at a low angle, and clean residue with a spot-tested solvent. Skip metal blades on finished wood and avoid soaking the surface, which can swell bare wood.
How should you prepare a cornhole board for a new vinyl wrap?
After removal, sand lightly with fine grit to level any raised grain, wipe away dust with a microfiber cloth, and let the board dry completely. A clean, smooth, sealed surface helps a replacement decal press down evenly and avoids air bubbles. Mask off edges you do not want covered, then align the new wrap before pressing down from the center outward.
