
How to Install Peel and Stick Wallpaper on Textured Walls

Last Updated: November 15, 2026
Quick Summary
You can install peel and stick wallpaper on textured walls only when the texture is shallow enough for the backing to make full contact, such as thin orange peel. Clean and prime the wall, run a test patch for a few days, then install with firm overlapping strokes. Deep knockdown, popcorn, stucco, and brick should be skim coated flat or avoided.
- Texture depth decides whether you install directly, skim coat, or pick another wall.
- Sanding only suits light orange peel and very shallow knockdown, never popcorn.
- Skim coating spreads thin joint compound coats to flatten medium texture before priming.
- A test patch left for a few days shows whether edges lift or bubbles grow.
- Thicker matte materials with strong adhesive hide ridges better than thin glossy stock.
Table of Contents
- Assessing Your Wall Texture Before You Install
- How to Smooth Textured Walls for Wallpaper
- The Peel and Stick Wallpaper Adhesive Primer Step
- Running a Test Patch and Adhesion Check
- Choosing the Best Wallpaper for Textured Walls
- Step-by-Step Installation on a Textured Surface
- Troubleshooting Bubbles, Lifting Edges, and Failures Over Time
- Ordering Custom Wallpaper for Your Textured Wall
- Frequently Asked Questions
Assessing Your Wall Texture Before You Install
Learning how to install peel and stick wallpaper on textured walls starts with one honest look at the surface. Texture decides how much contact the backing can make and whether the job is a weekend project or a drywall repair.
Wall texture is the depth, pattern, and roughness of a wall surface that determines how much contact a peel and stick backing can make. Shallower texture means more contact. Deeper texture means less.
Run your palm flat across the wall, then hold a straight edge or level against it and look for daylight underneath.
A Texture-by-Texture Decision Guide
Not all texture behaves the same. The finish name tells you what to expect, and the decision to install directly, skim-coat, or avoid wallpaper should follow the finish, not a generic "light/medium/heavy" label.
| Finish | What It Looks Like | Typical Depth | Install Directly? | Best Path |
|---|---|---|---|---|
| Thin orange peel | Fine, splattered dots; feels like an orange rind | Very shallow | Yes, with clean and prime | Install directly on a primed, matte wall |
| Heavy orange peel | Denser, larger splatter; visible shadowing | Shallow to moderate | Sometimes | Sand high points, prime, then install with a thick matte material |
| Light knockdown | Flattened blobs with soft edges | Moderate | With effort | Skim coat or sand, prime, then install |
| Deep knockdown | Pronounced ridges and valleys | Moderate to deep | No | Skim coat to flat or choose another wall |
| Popcorn (stucco) | Bumpy, lumpy, sharp peaks | Deep | No | Do not sand; skim coat, line with heavy liner, or avoid |
| Deep stucco / brick | Hard, irregular, proud relief | Deep | No | Smooth with a skim coat or choose a different surface |
Test where the light hits, since that is where lifting edges and texture telegraphing tend to show first.
Watch out: popcorn and deep stucco can hide loose layers. Press a putty knife gently into a peak; if material crumbles or flakes, the surface should be stabilized before applying any wall covering.
Reading the Wall Like an Installer
Before you commit, check three things beyond depth:
- Sheen: glossy paint lets adhesive slide; matte or primed surfaces grip. If the wall shines under a flashlight, plan on a primer coat.
- Soundness: patched drywall, old water stains, and crumbling paint all fail under a panel. Scrape a small area; if it chalks or lifts, repair first.
- Consistency: a wall that is smooth in one area and heavily textured in another will telegraph unevenly and can look wavy even when fully adhered.
If the texture is borderline, the test patch below is the deciding vote.
How to Smooth Textured Walls for Wallpaper
Smoothing a textured wall means reducing the high points so the wallpaper backing can make full contact. You have four real routes: sanding, skim coating, lining paper, or walking away. The right one depends on how deep the texture runs and how much work you are willing to do.
Sanding: For Light Texture Only
Sanding can work on light orange peel and very shallow knockdown. Wear a mask and eye protection, wipe the wall with a damp cloth, and let it dry fully before priming.
Watch out: sanding walls in older homes can disturb old paint layers. Test a small spot first, and if the paint chalks or crumbles, stop and get advice. Sanding popcorn is a trap: the peaks crumble instead of smoothing, and the surface gets rougher, not flatter.
Skim Coating: The Reliable Route for Medium Texture
Skim coating can help with medium knockdown and light plaster swirl by spreading a thin layer of joint compound, letting it cure, and sanding smooth. It is dusty, slow work, but it can produce a flatter surface.
A practical sequence:
- Scrape any loose material and wipe the wall clean
- Apply the first thin coat with a 10- to 12-inch broad knife
- Let it cure fully, then scrape ridges and sand lightly
- Apply a second thin coat over low spots
- Sand smooth with fine grit, wipe dust, and prime before installing
Skim coating adds time and mess, but it can flatten deep knockdown without replacing drywall.
Lining Paper: A Middle Option
Heavy lining paper can help bridge light to moderate texture. It adds a layer that must itself adhere well, and liner seams can telegraph through thin wallpaper.
When to Call It
If the texture is popcorn, deep stucco, or brick, consider choosing a different wall, hiring a drywall professional, or selecting a different wall covering.
Comparing the Alternatives Honestly
- Sanding: can suit light texture.
- Skim coating: can suit medium texture, though it takes more time and creates more dust.
- Lining paper: can add a smoother layer over shallow texture.
- Traditional wallpaper over liner: a fallback when peel and stick adhesion is doubtful, but a different skill set and removal story.
- Walking away: sometimes the right call, a smooth adjacent wall may be a better use of the same wallpaper.
The goal is not a perfectly flat wall in every case, but a surface flat enough that the panel adheres fully and the texture does not print through. If sanding or a skim coat cannot get you there, the wall is telling you to choose another surface.
The Peel and Stick Wallpaper Adhesive Primer Step
A peel and stick wallpaper adhesive primer is a wall coating that can give the wallpaper backing a more consistent surface to grip. Bare drywall, fresh paint, and patched spots may grab differently.
Here is how we would do it:
- Wipe the wall with a damp cloth and let it dry completely
- Fill any holes or cracks with spackle, then sand flush
- Apply a stain-blocking or wallpaper-specific primer with a roller
- Let it cure for the full time on the label, not "close enough"
- Lightly sand any ridges, then wipe off dust
- Check the wall is dry to the touch before any panel goes up
Glossy paint can make peel and stick adhesive slide, so a matte primer coat may help.
Running a Test Patch and Adhesion Check
A test patch is a small square of wallpaper applied to the prepared wall and left for a few days to see how the adhesive behaves.
Cut a square roughly the size of your hand.
Then wait a few days in normal room conditions, checking daily.
What to look for:
- Edges curling up or lifting
- Bubbles that grow instead of flatten
- The panel sliding or shifting
- Texture ridges showing through as sharp lines
If the patch holds flat, your wall may be ready. If it lifts, the wall may need more prep or a different approach.
Choosing the Best Wallpaper for Textured Walls
Thicker, matte materials with a strong adhesive backing are often a reasonable choice for textured walls, since thinner stock can show more ridges and glossy finishes can highlight bumps.
What to check before you buy:
- Weight: thicker material bridges light texture instead of sinking into it
- Finish: matte hides surface flaws that gloss magnifies
- Adhesive strength: look for a backing rated for painted drywall
- Pattern scale: bold, busy patterns distract the eye from texture ridges
- Panel width: wider panels mean fewer seams to align
For a closer look at how different materials handle texture, our guide to the best custom wallpaper for textured walls breaks down the options side by side. If you are still deciding between adhesive and paste, this peel and stick mural vs traditional wallpaper comparison covers the trade-offs honestly.
At Let's Print Big, our murals arrive weeded and masked and are printed at high resolution. Check our product pages for material details.
Step-by-Step Installation on a Textured Surface
Installation on texture rewards patience.
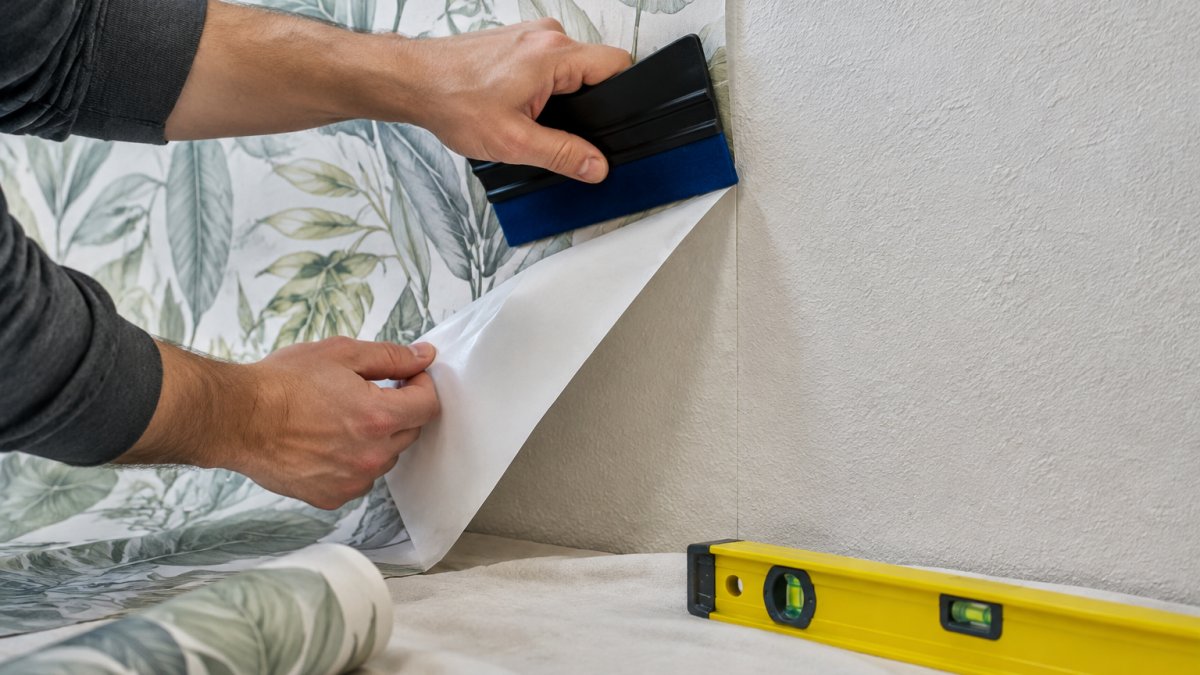
What you'll need:
- Tape measure and pencil
- Level
- Squeegee or felt-edged smoothing tool
- Sharp utility knife with fresh blades
- Clean lint-free cloths
- Step ladder
Step 1: Measure and plan panel placement. Measure wall height and width.
Step 4: Smooth from the center outward. Push air toward the edges with your squeegee.
Step 5: Align the next panel before pressing. Match the pattern at eye level first.
Step 6: Trim the edges. Run your knife along the ceiling, corners, and baseboard.
Step 7: Press all seams and edges again. Edges lift first.
For beginner-friendly walkthroughs, our DIY wall mural installation tips for beginners go deeper on technique.
Troubleshooting Bubbles, Lifting Edges, and Failures Over Time
Bubbles and lifting edges can be caused by trapped air, weak adhesion, or a wall that was not fully dry.
- Small bubbles: prick with a pin and press flat with your smoothing tool
- Large bubbles: lift the panel back to that spot, smooth, and reapply
- Lifting edges: warm the edge gently, press firmly, and hold for a minute
- Panel shifting: the wall is too slick; add a matte primer coat
- Seams opening: pattern was stretched during alignment; re-lay that panel
Room conditions can affect installation. Keeping the space at normal indoor temperature during and after install is a sensible precaution.
If you are worried about long-term wear, our guide on whether custom vinyl wall murals are durable answers the question directly. A common mistake is blaming the wallpaper for lifting when the real culprit was an unprimed or damp wall.
Ordering Custom Wallpaper for Your Textured Wall
When ordering custom wallpaper, image resolution is important.
Resolution matters because wallpaper panels are large. Our explainer on why custom graphics look pixelated online walks through what to check before you upload.
Measure twice, order once. Give exact wall dimensions, including height to the trim.
Installing peel and stick wallpaper on a textured wall often depends on surface preparation. Preparing the surface and testing adhesion can help the panels adhere well.
Frequently Asked Questions
Can I put peel and stick wallpaper on slightly textured walls?
Slightly textured walls with a fine, even finish like light orange peel may work if you clean and prime first, then run a test patch. Press a scrap panel onto the wall for 24 to 48 hours and check for lifting edges or bubbles. If it holds firm, proceed with full panels. Heavier textures like knockdown or popcorn usually need smoothing or a different approach because the adhesive cannot reach enough flat surface to grip.
What are the most common mistakes when applying wallpaper to textured surfaces?
Common mistakes include skipping the cleaning step, applying over dusty or glossy paint, and not testing adhesion first. Others include pressing panels down hard before aligning the pattern, letting edges lift because the texture leaves gaps, and installing in a cold room where the adhesive stays stiff. Wipe the wall with a damp cloth, let it dry fully, prime if needed, and smooth each panel gradually with a squeegee rather than pressing the whole sheet at once.
Will peel and stick wallpaper stay on knockdown texture?
Knockdown texture has raised ridges and recessed valleys, so contact between the adhesive and the wall is uneven. Light knockdown may hold with a primer designed for slick surfaces and careful smoothing, but heavy knockdown can lead to lifting edges and trapped air. Sanding the high spots or applying a skim coat to flatten the surface gives the wallpaper a reliable base. Test a small patch before committing to full rolls.
How can I tell if my wall texture is too rough for wallpaper?
Run your hand across the wall and look at it in raking light from a lamp held at an angle. If you feel sharp peaks, deep grooves, or flaking material, the texture is likely too rough. A simple test: press a strip of painter's tape firmly onto the wall and peel it off. If the tape lifts texture or comes away with grit, the surface may need smoothing. A test patch of actual wallpaper can help show how the wall performs.
